Plastic Wall Panel Installation in Bedford-Stuyvesant, Brooklyn
A plain room wall was upgraded with black plastic decorative panels. Repair Asap measured the layout, checked alignment, cut openings around electrical outlets, and fastened the panels securely in about four hours.
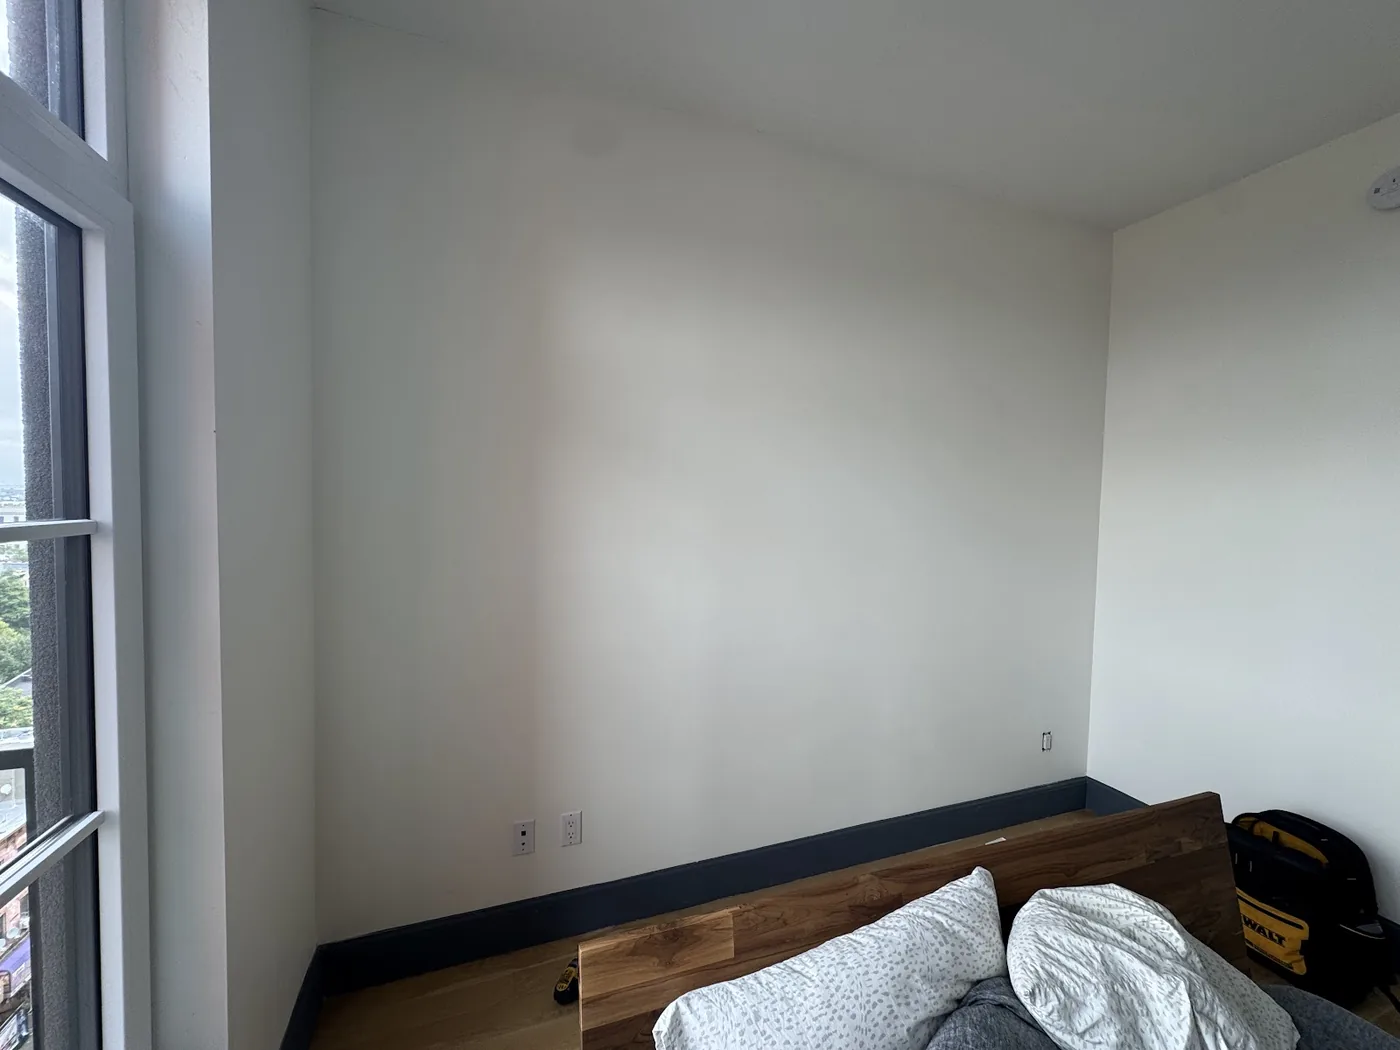
Plain wall ready for a decorative panel upgrade
The project started with a plain interior wall in a Bedford-Stuyvesant, Brooklyn room. The client wanted a cleaner accent-wall look using black plastic decorative panels.
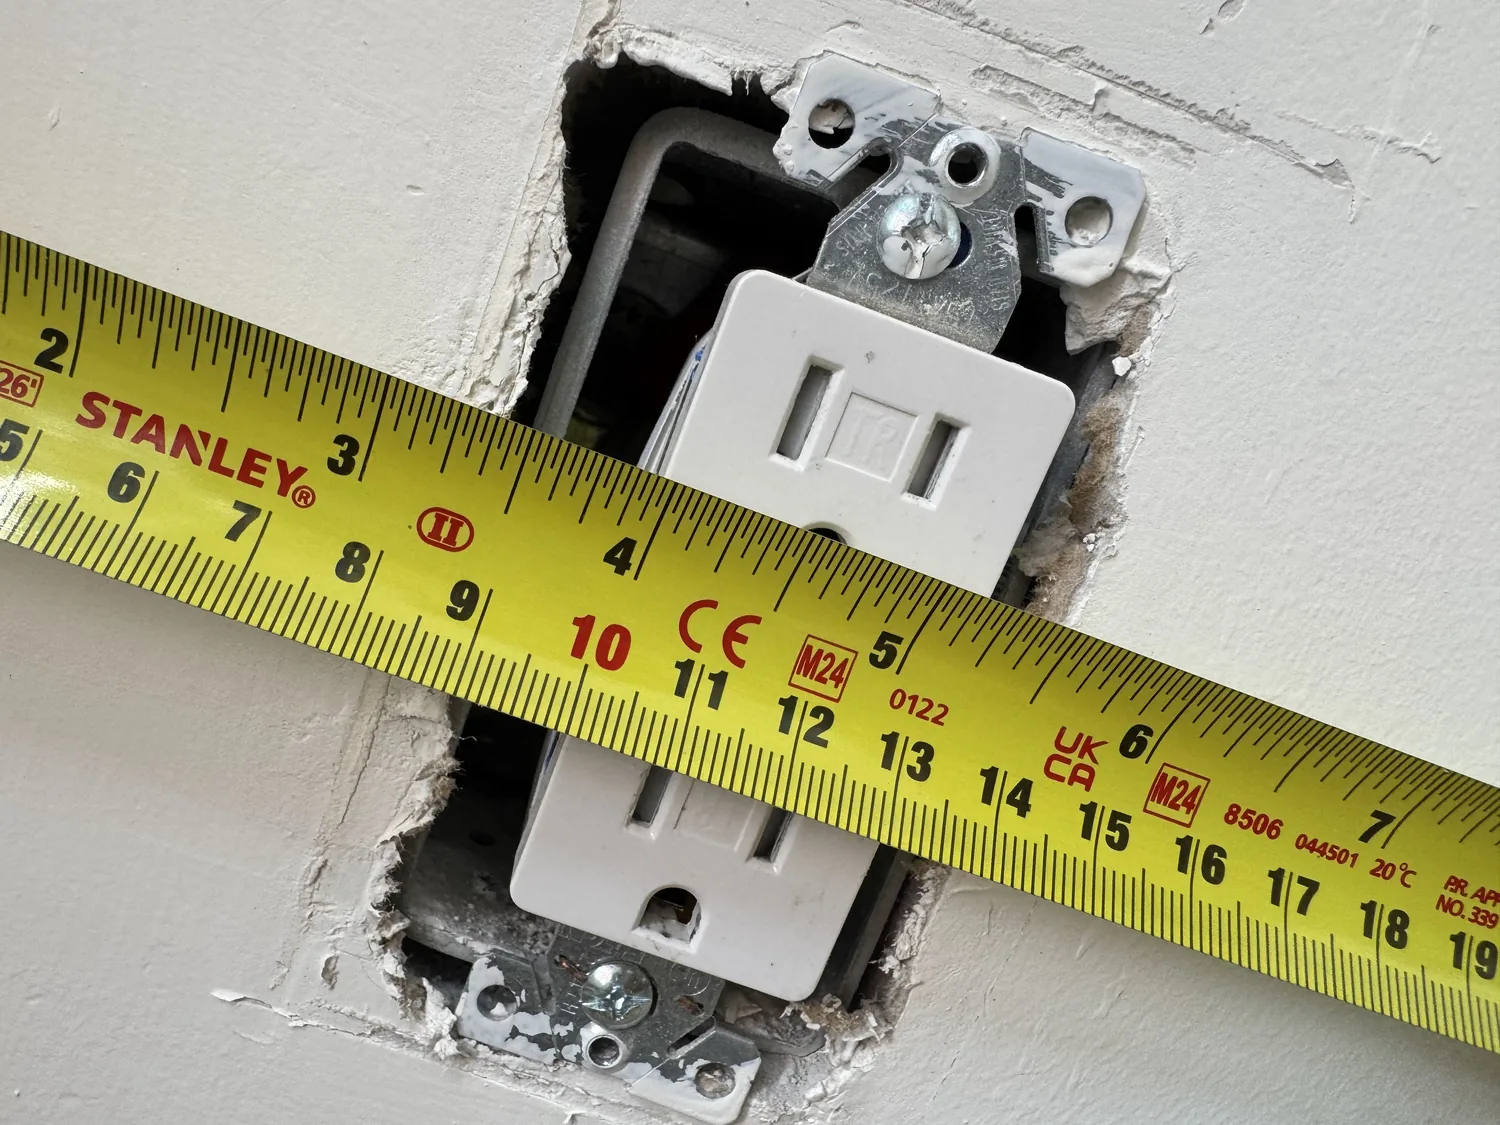
Before fastening anything, the wall and outlet positions had to be measured so the panels would line up and the electrical receptacles would remain accessible.
Scope of work
- Measured the wall and planned the panel layout before fastening
- Checked panel alignment so the visible lines stayed straight
- Marked electrical outlet positions before cutting the openings
- Cut and test-fit outlet openings for a clean fit around receptacles
- Fastened the plastic wall panels securely to the wall
- Rechecked outlet openings and final panel alignment
- Completed the wall-panel installation in about four hours
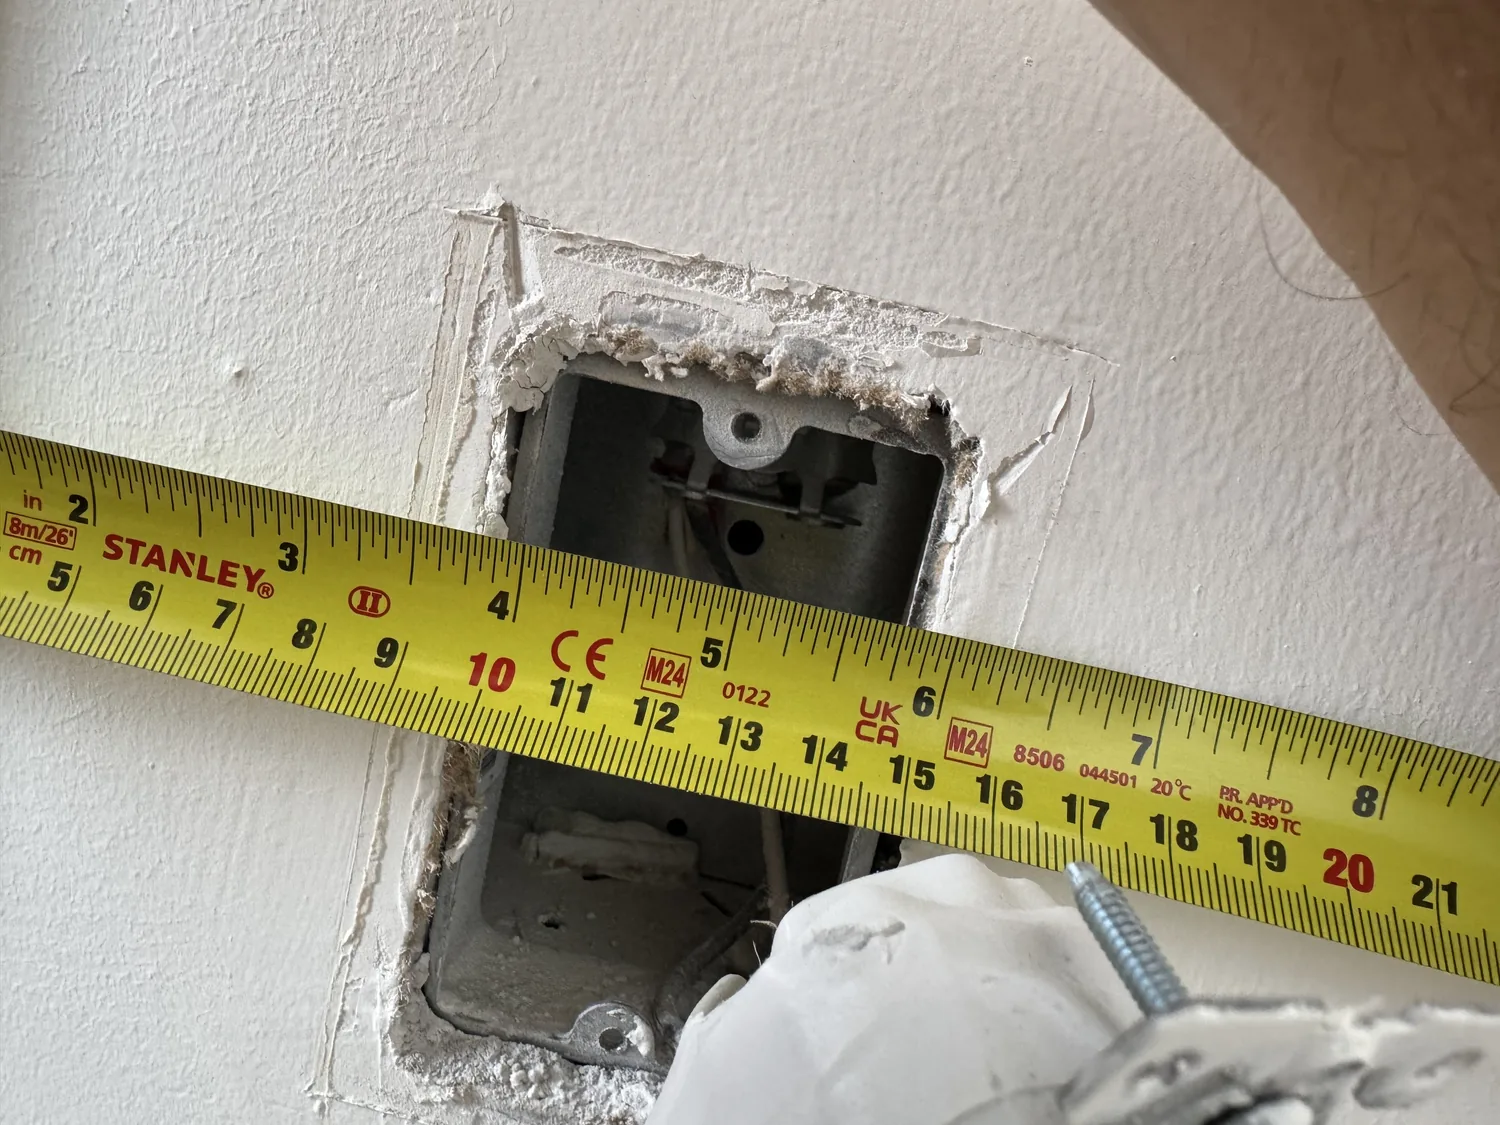
Before: wall layout and outlet locations checked
The room wall was measured and checked before panel placement, with outlet locations marked for cutouts.
Measured panel layout with clean outlet cutouts
The panel layout was planned around the existing outlets. Measurements were taken horizontally and vertically so each opening could be cut in the correct position.
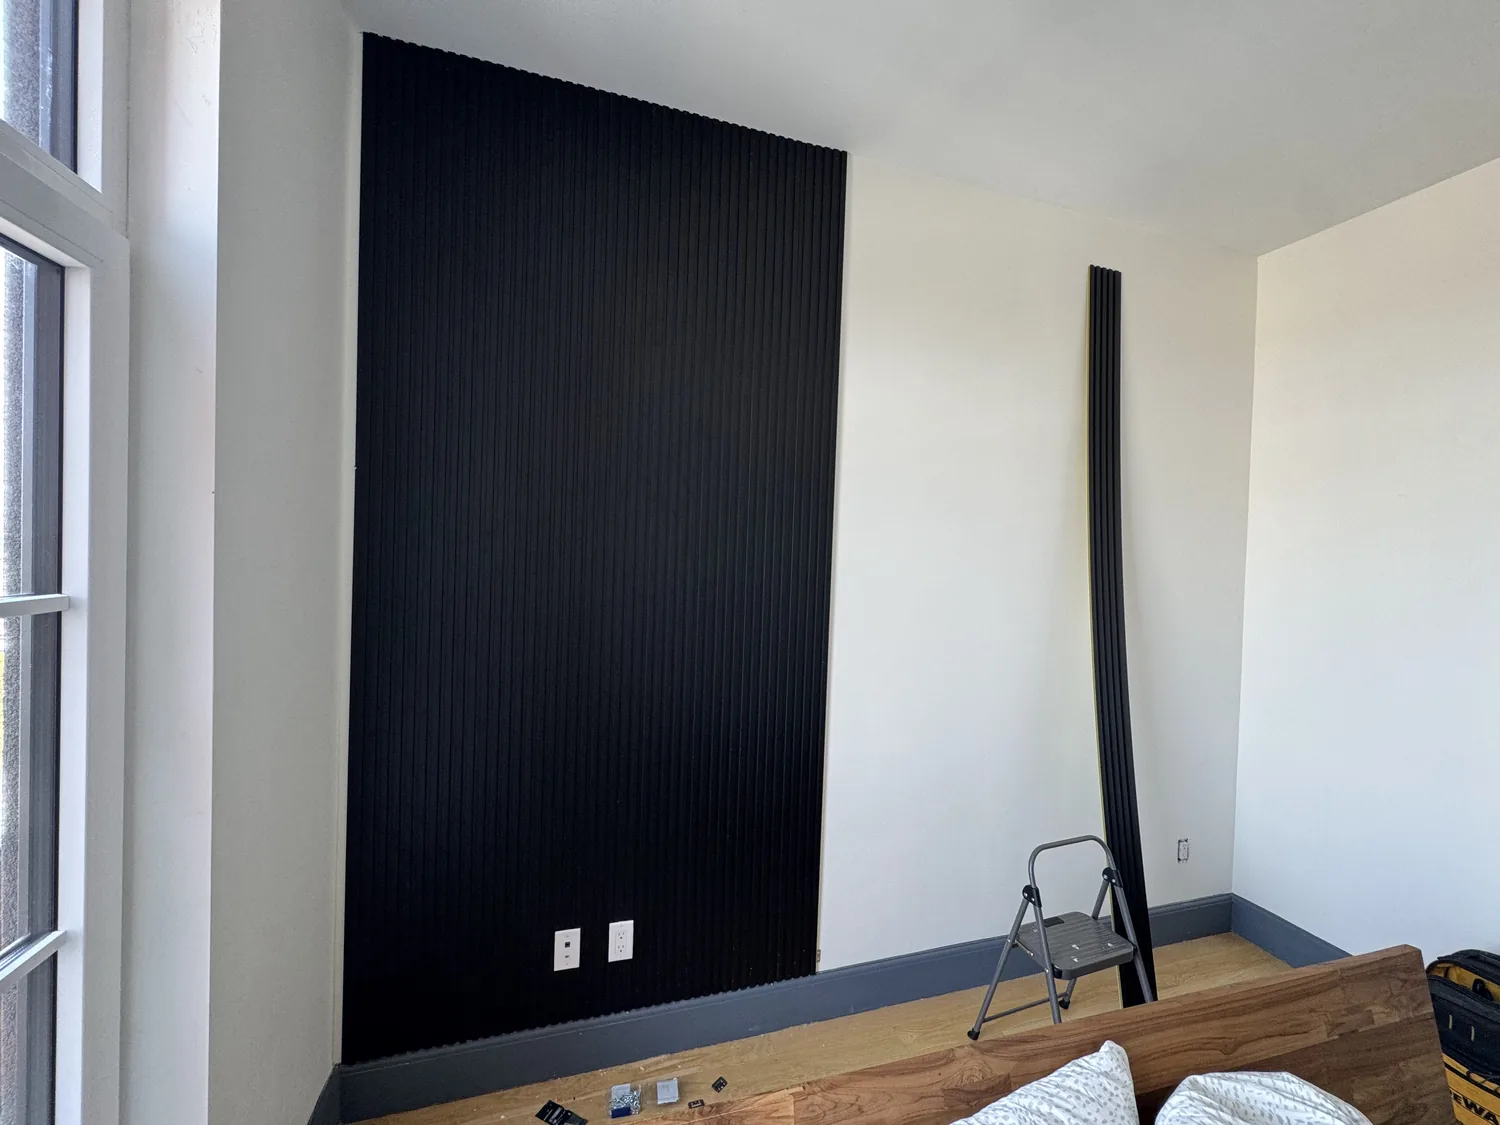
After the outlet openings were marked, the panels were cut and test-fitted around the receptacles. This avoids forcing a panel over an outlet or leaving oversized gaps around the electrical box.
Once the cuts were confirmed, the panels were aligned and fastened to the wall. The visible panel lines were kept straight, and the receptacles remained accessible after installation.
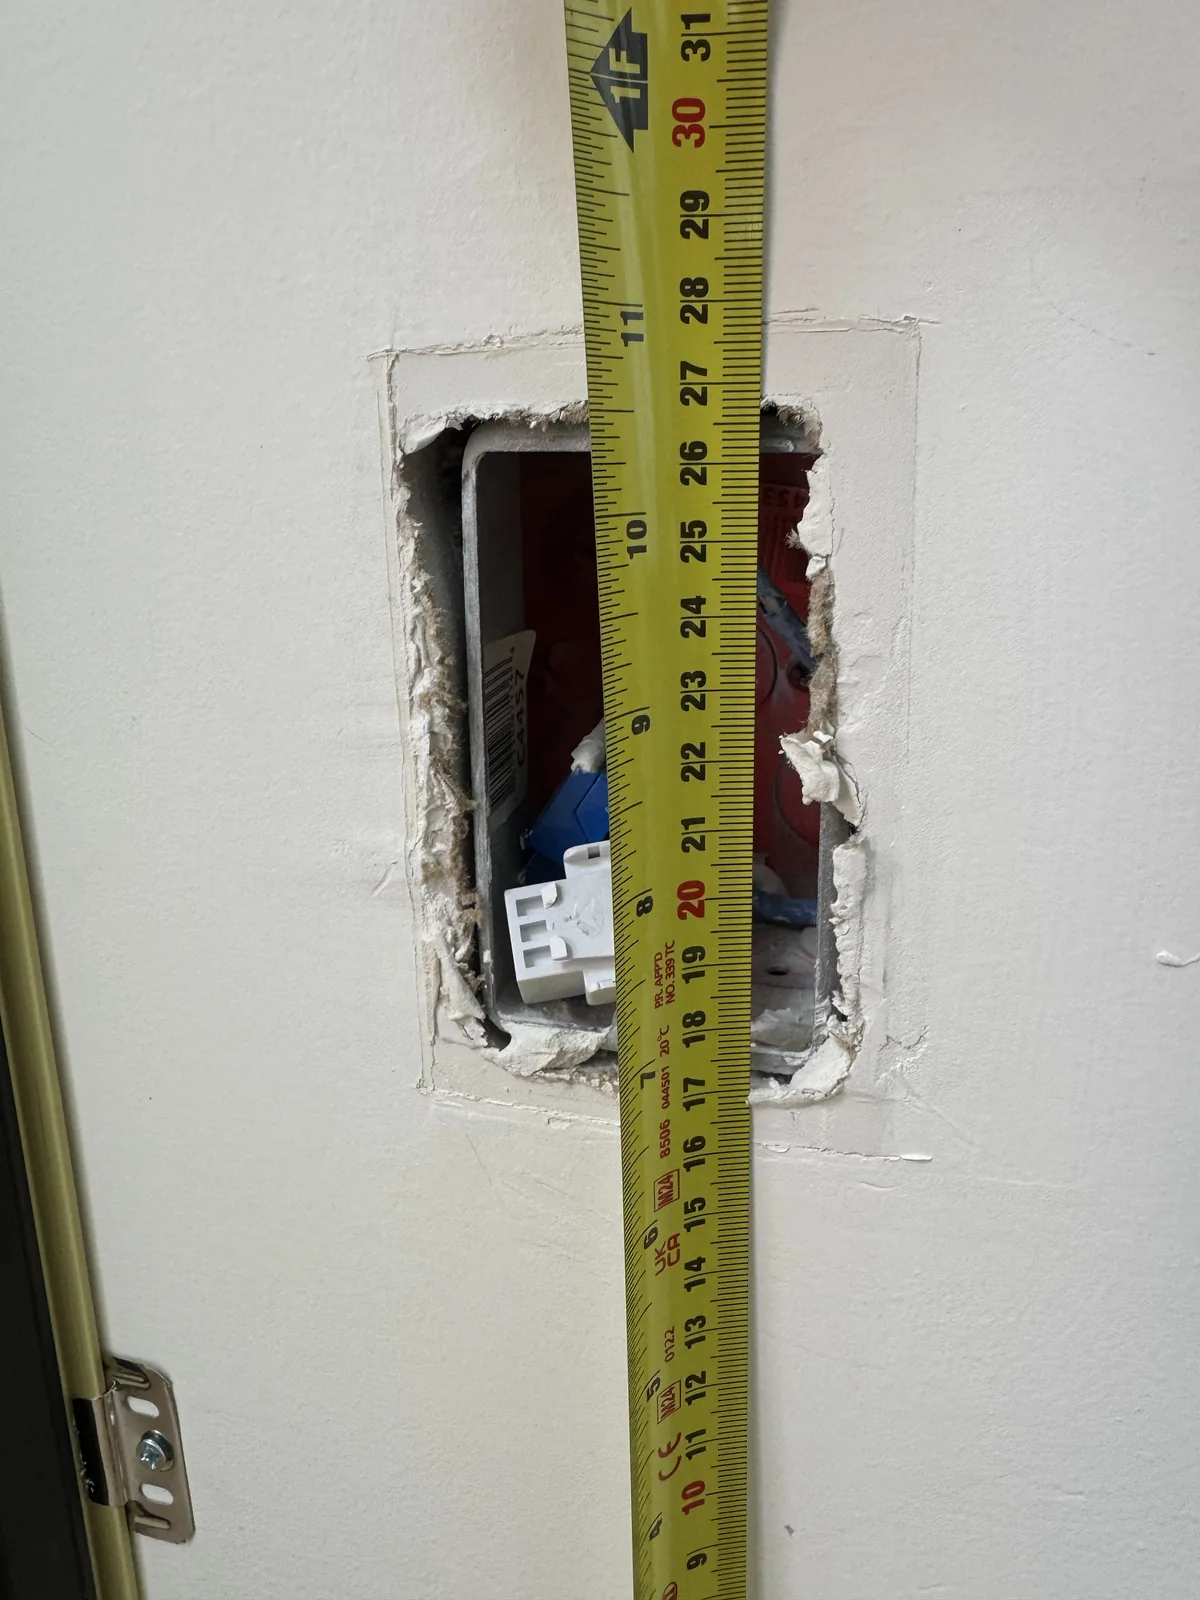
Process: measuring outlet openings and checking alignment
Selected details from the layout and cutout work before the panels were fastened to the wall.
Wood slat partition with integrated lighting
A drywall partition was built to separate the dining/break area from the main customer space, then finished with vertical wood slat panels and integrated accent lighting.
This detail gave the barbershop a warmer, more premium look while keeping the space practical for day-to-day commercial use.
Details: outlet cutouts kept accessible
The outlets were measured before cutting so the finished panel surface could sit cleanly around each receptacle.

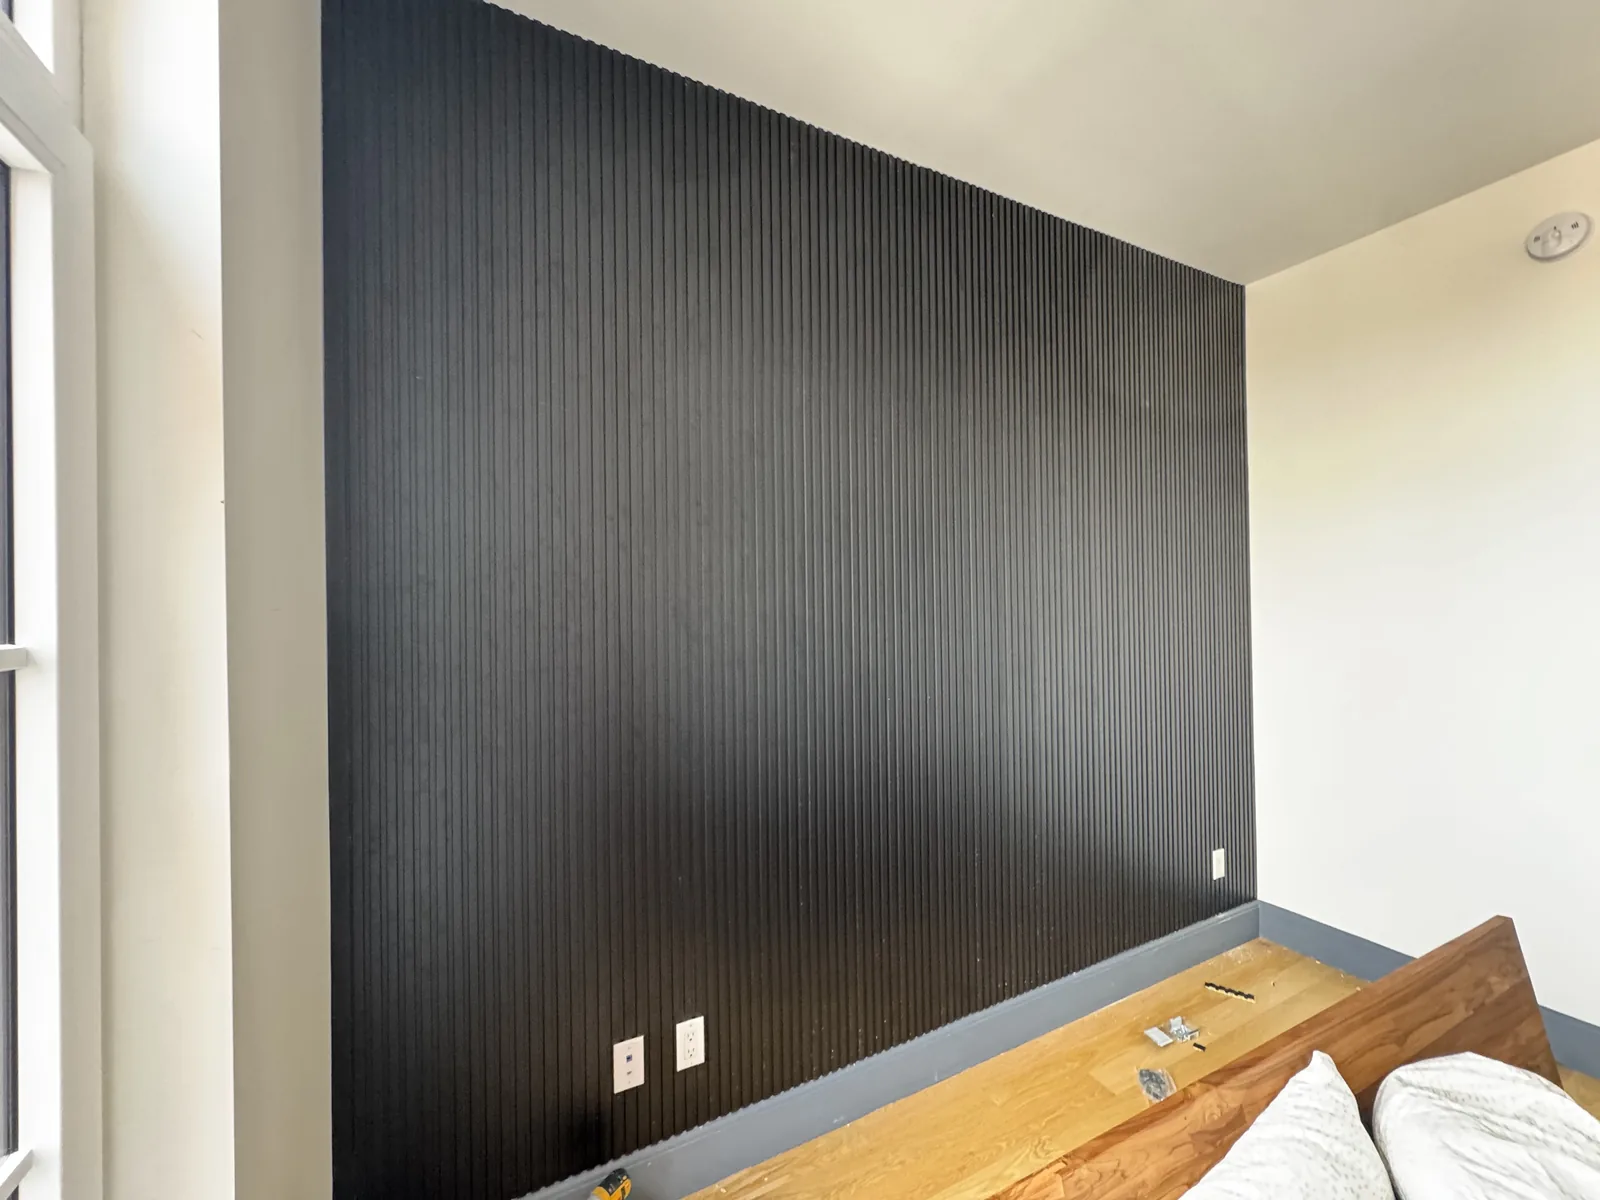
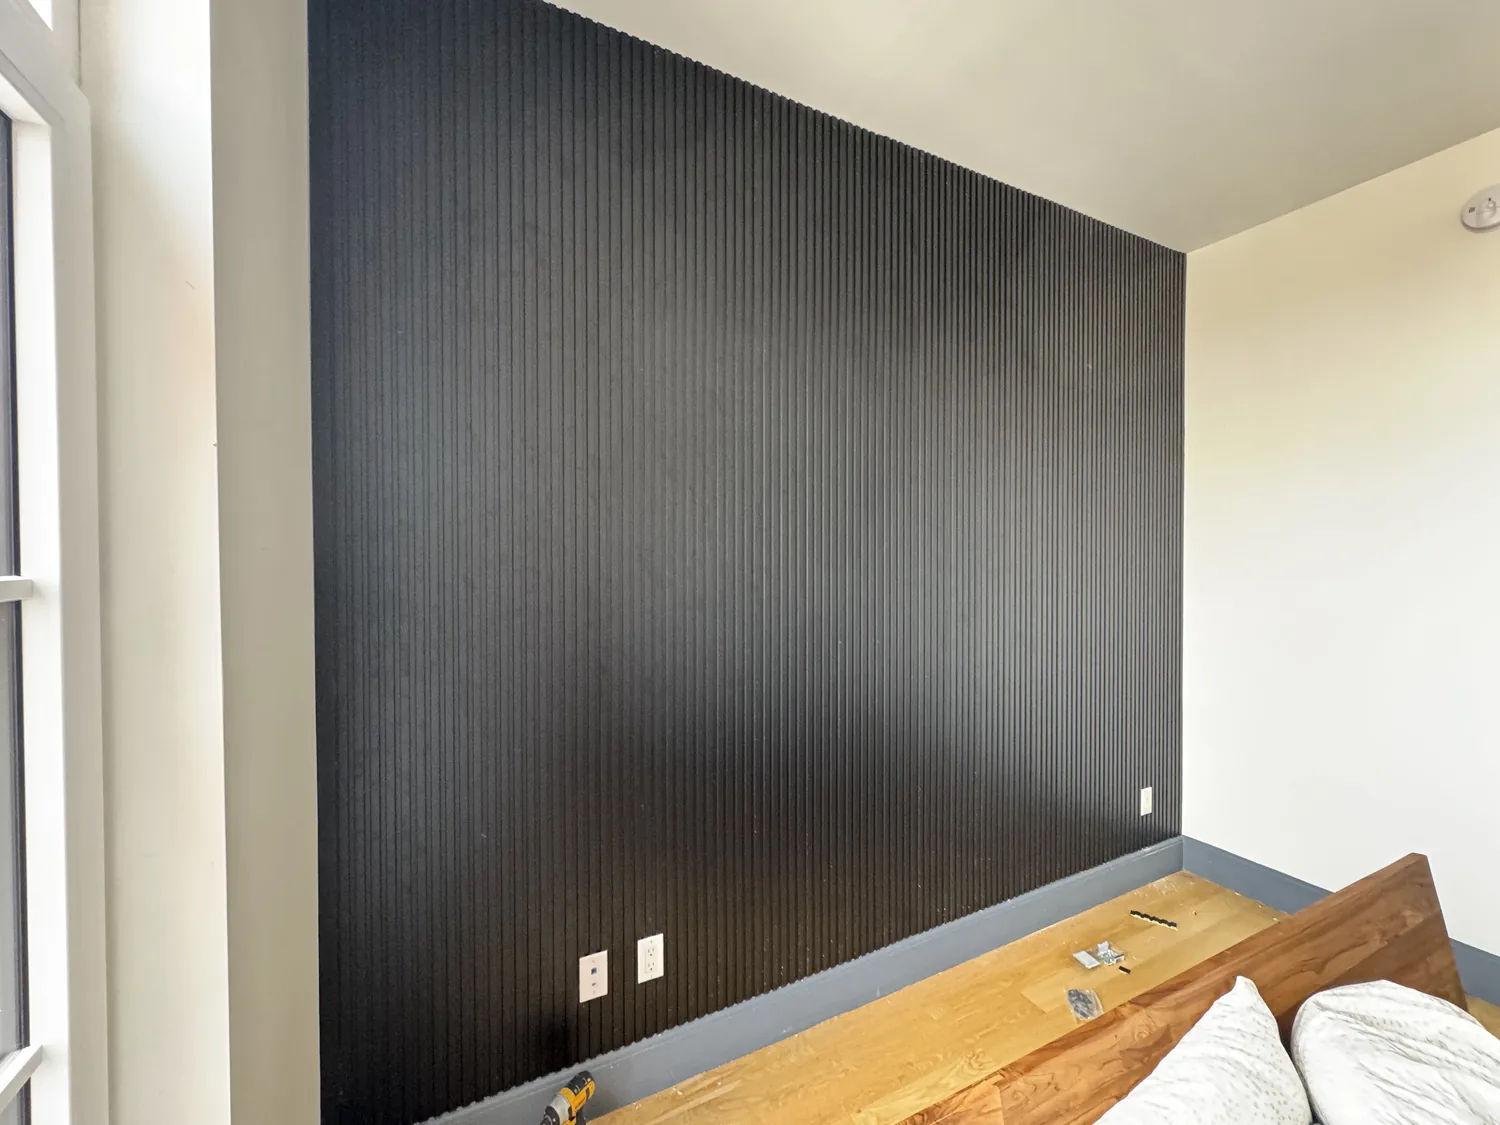
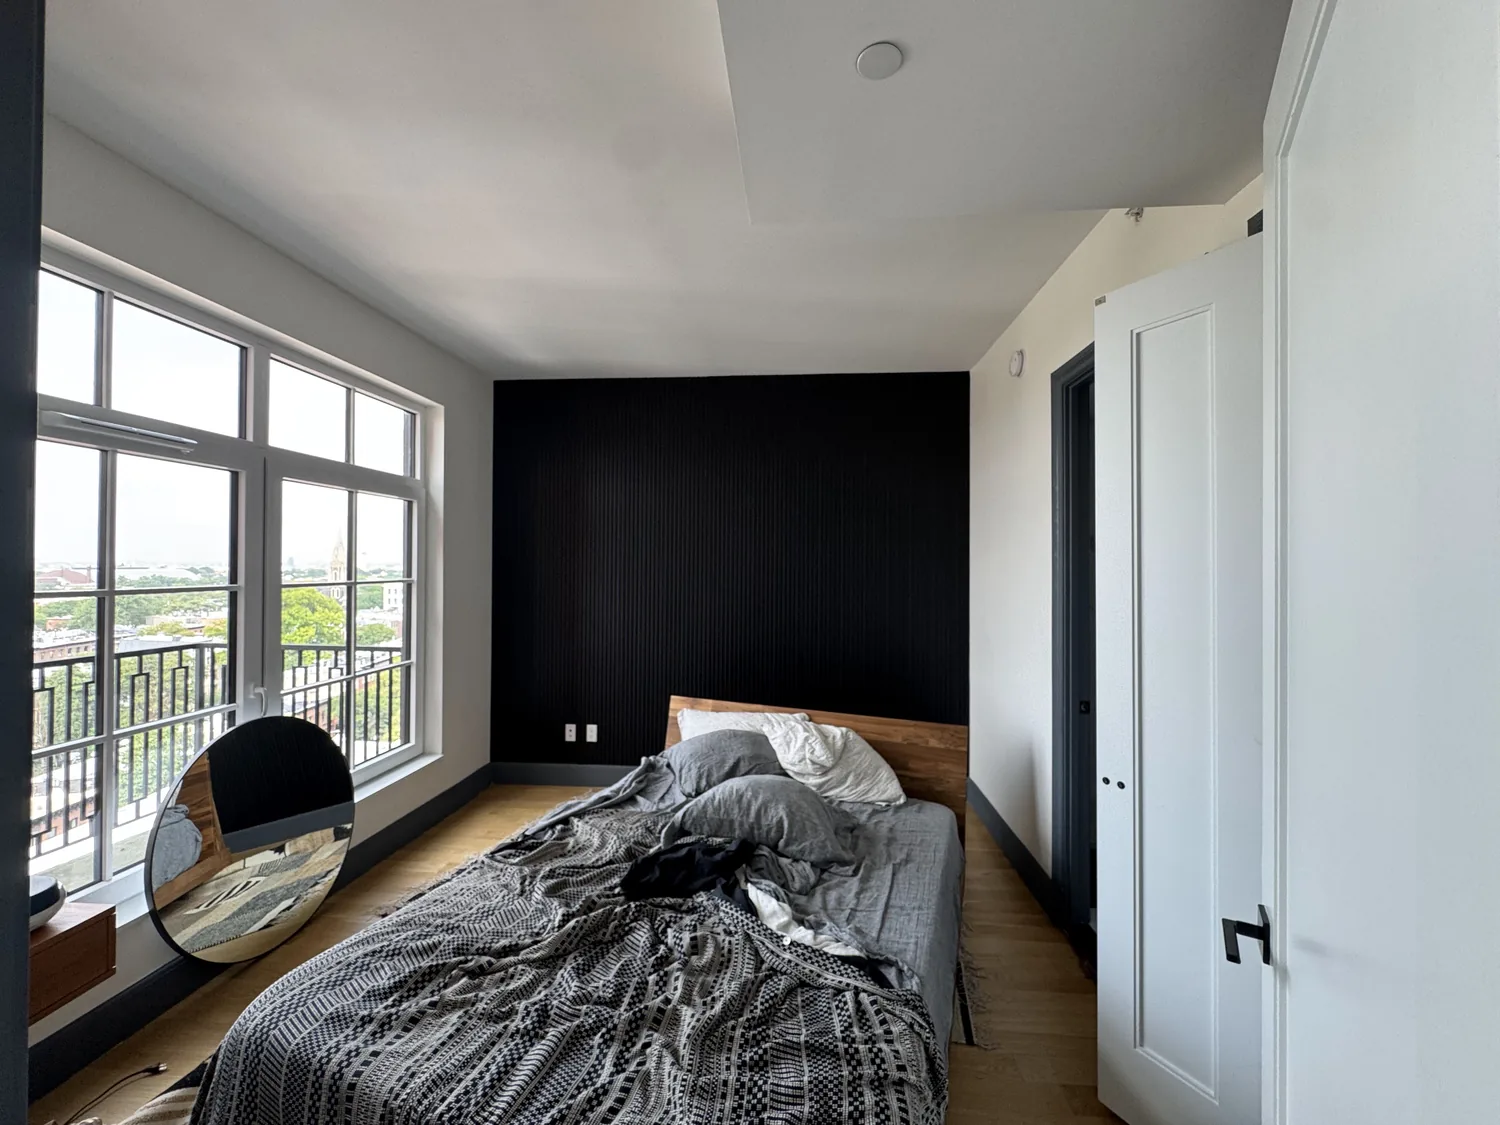
After: finished black plastic panel accent wall
The completed wall has a clean black panel finish, aligned vertical lines, and accessible outlets.
Need wall panels or an interior upgrade?
This project connects general handyman layout, wall fastening, and detail cutting around existing fixtures.
Wall panel installation FAQ
How long does plastic wall panel installation take?
Small accent-wall installs can often be completed in a few hours. This Bedford-Stuyvesant project took about four hours, including layout, outlet cutouts, alignment, fastening, and checks.
Can wall panels be installed around electrical outlets?
Yes. The outlet positions should be measured and marked before cutting so the panel fits cleanly around the receptacle and the outlet remains accessible.
Do you need to remove outlets before installing panels?
It depends on the wall, panel thickness, and outlet setup. The important part is not to bury the outlet or leave an unsafe fit. For electrical adjustments beyond simple access and cover-plate fit, a licensed electrician may be required.
Can Repair ASAP install decorative wall panels supplied by the customer?
Yes. Customers can provide the panel material, and Repair ASAP can help with measuring, cutting, alignment, and fastening based on the wall condition and product type.
Planning wall panels, trim, or a small interior upgrade?
Send photos of the wall, panel material, and any outlet or trim details. Repair ASAP can review the layout and give the next step.