Chess-Pattern Painted Floor in Baldwin, Long Island
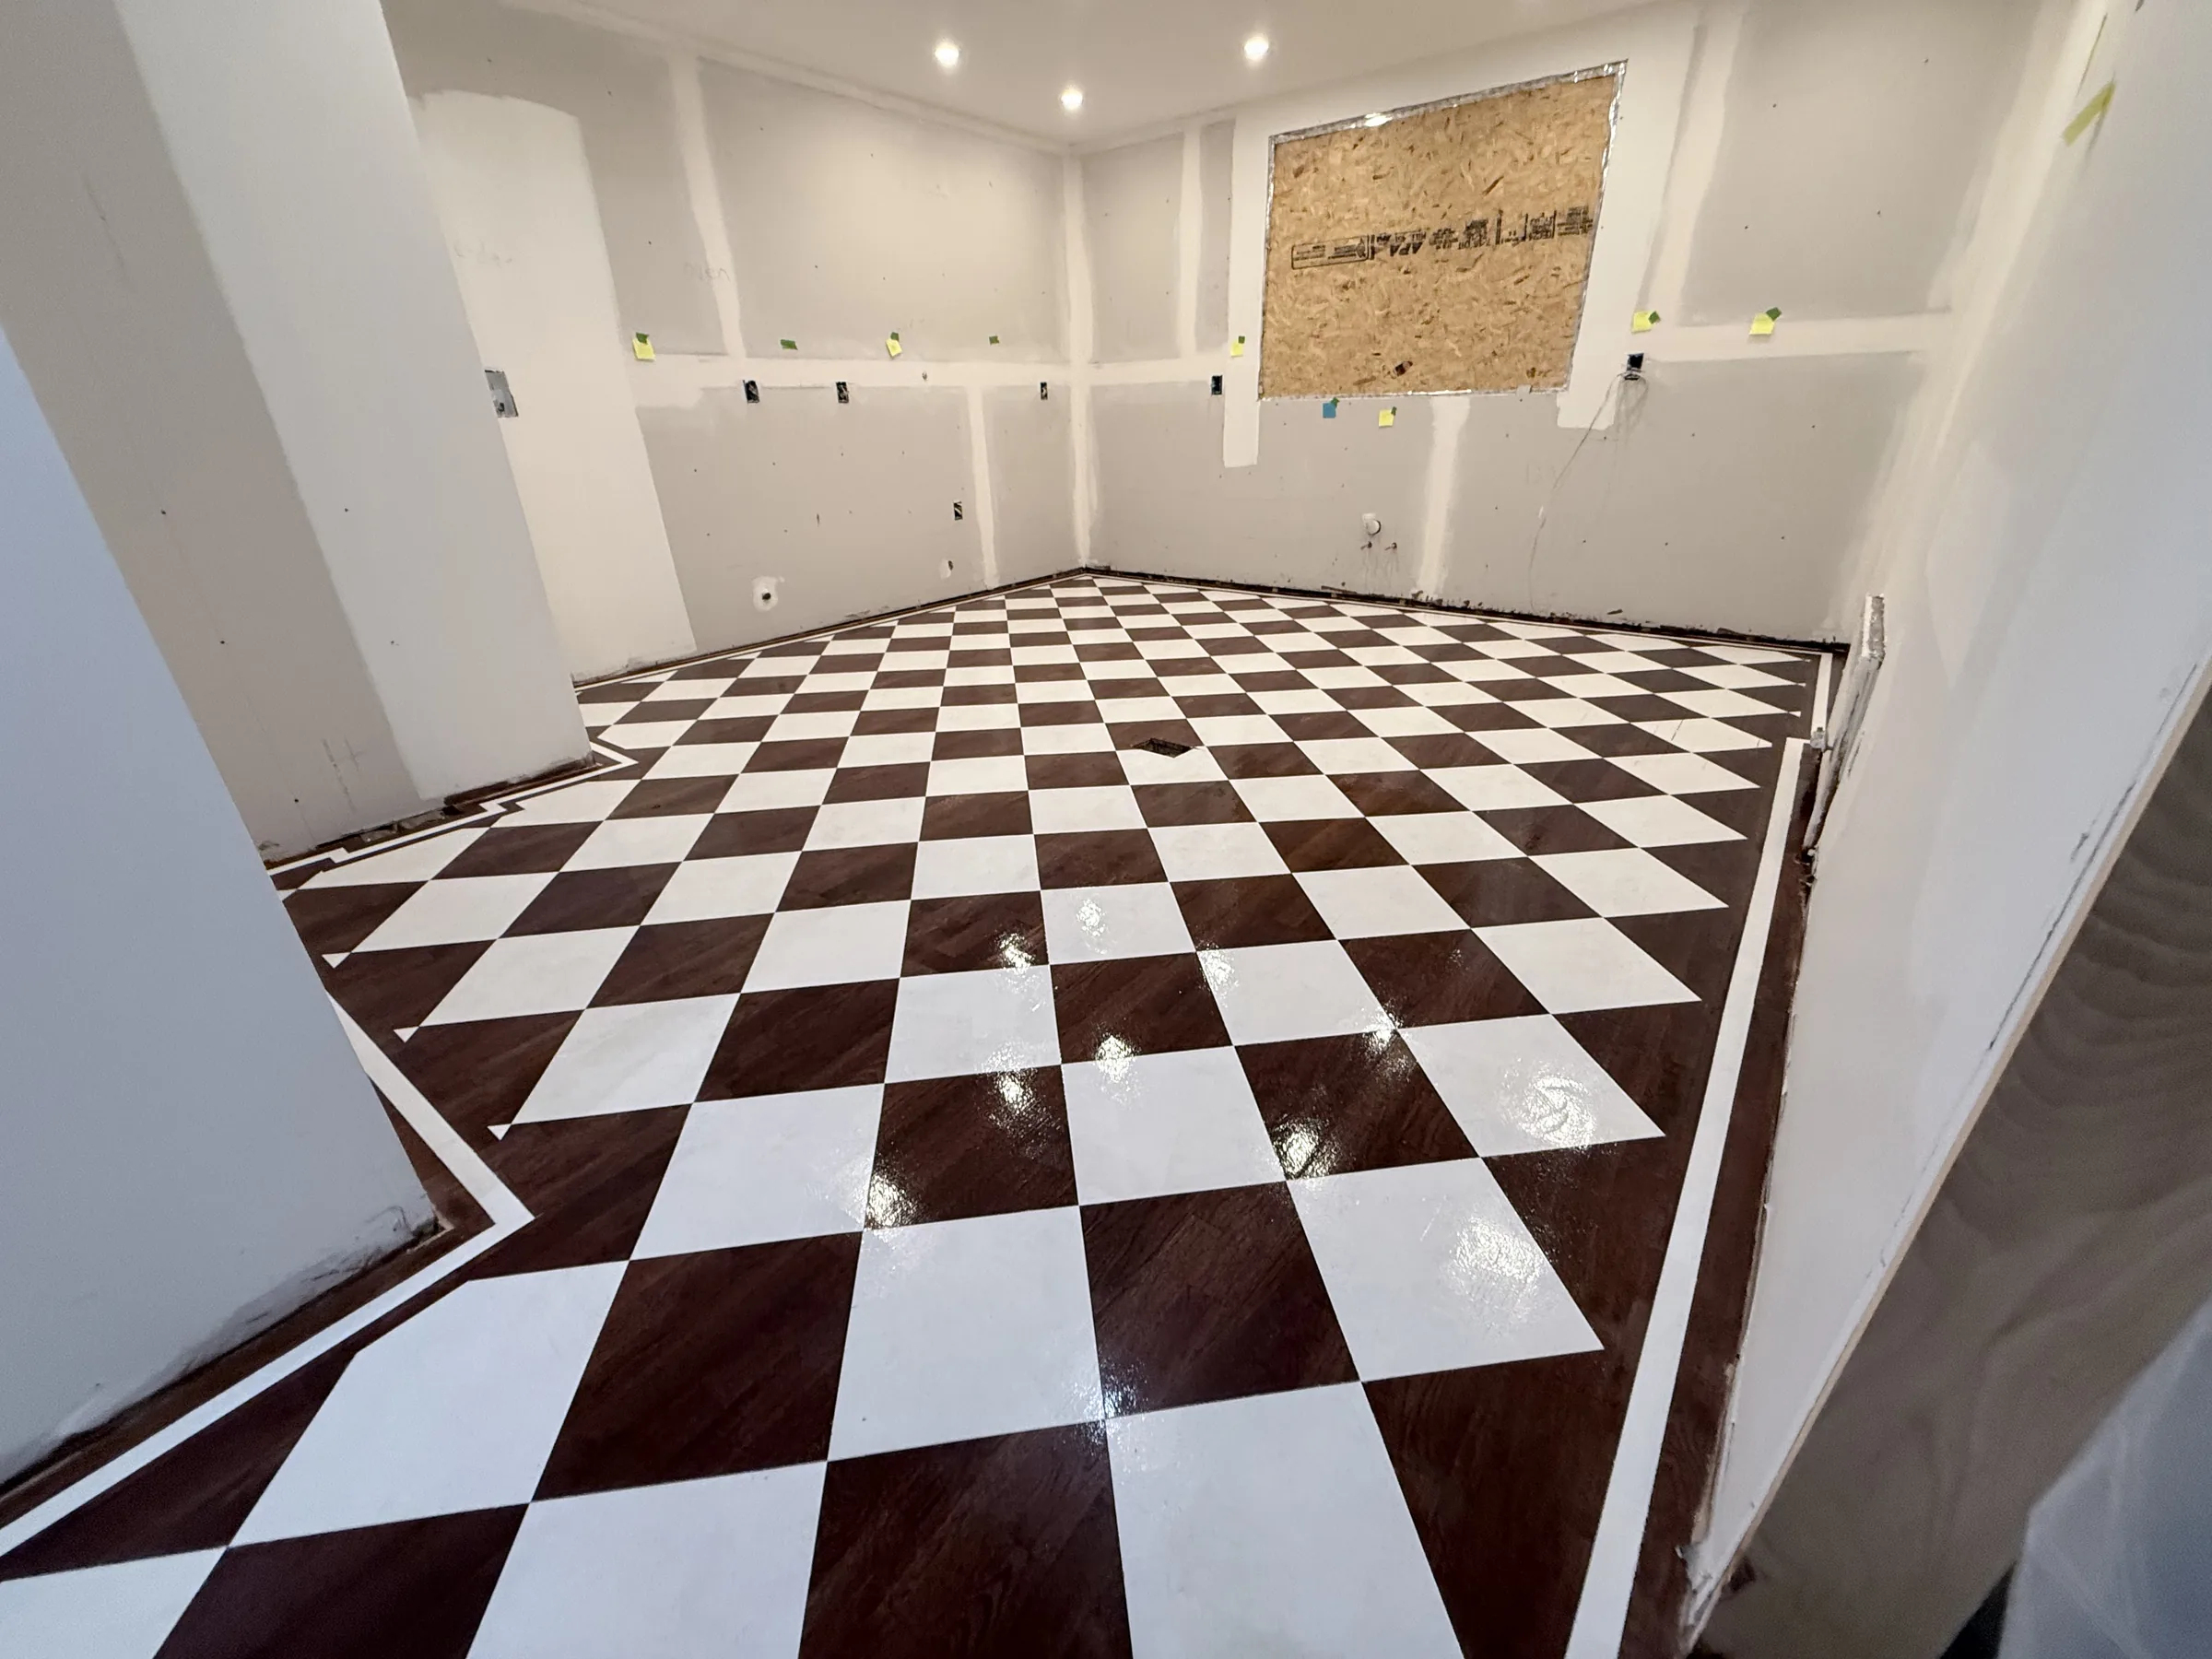
A stained wood floor had already been painted into a chess pattern once, but the homeowner wasn't happy with the result. Repair ASAP taped out a fresh diagonal diamond grid, painted it in two coats, and sealed the finish with a two-coat epoxy-based polyurethane topcoat over four visits.
Repair ASAP no longer takes new jobs on Long Island.
The floor already had a dark stain applied, and a previous chess-pattern paint job hadn't come out the way the homeowner wanted. She asked Repair ASAP to redo it properly.
That meant starting the layout from scratch: taping a diagonal diamond grid that was square and evenly sized across the whole room, so the finished pattern would read as clean and consistent from every angle.
Scope of work
Review the existing chess-pattern floor and reset it for a clean redo
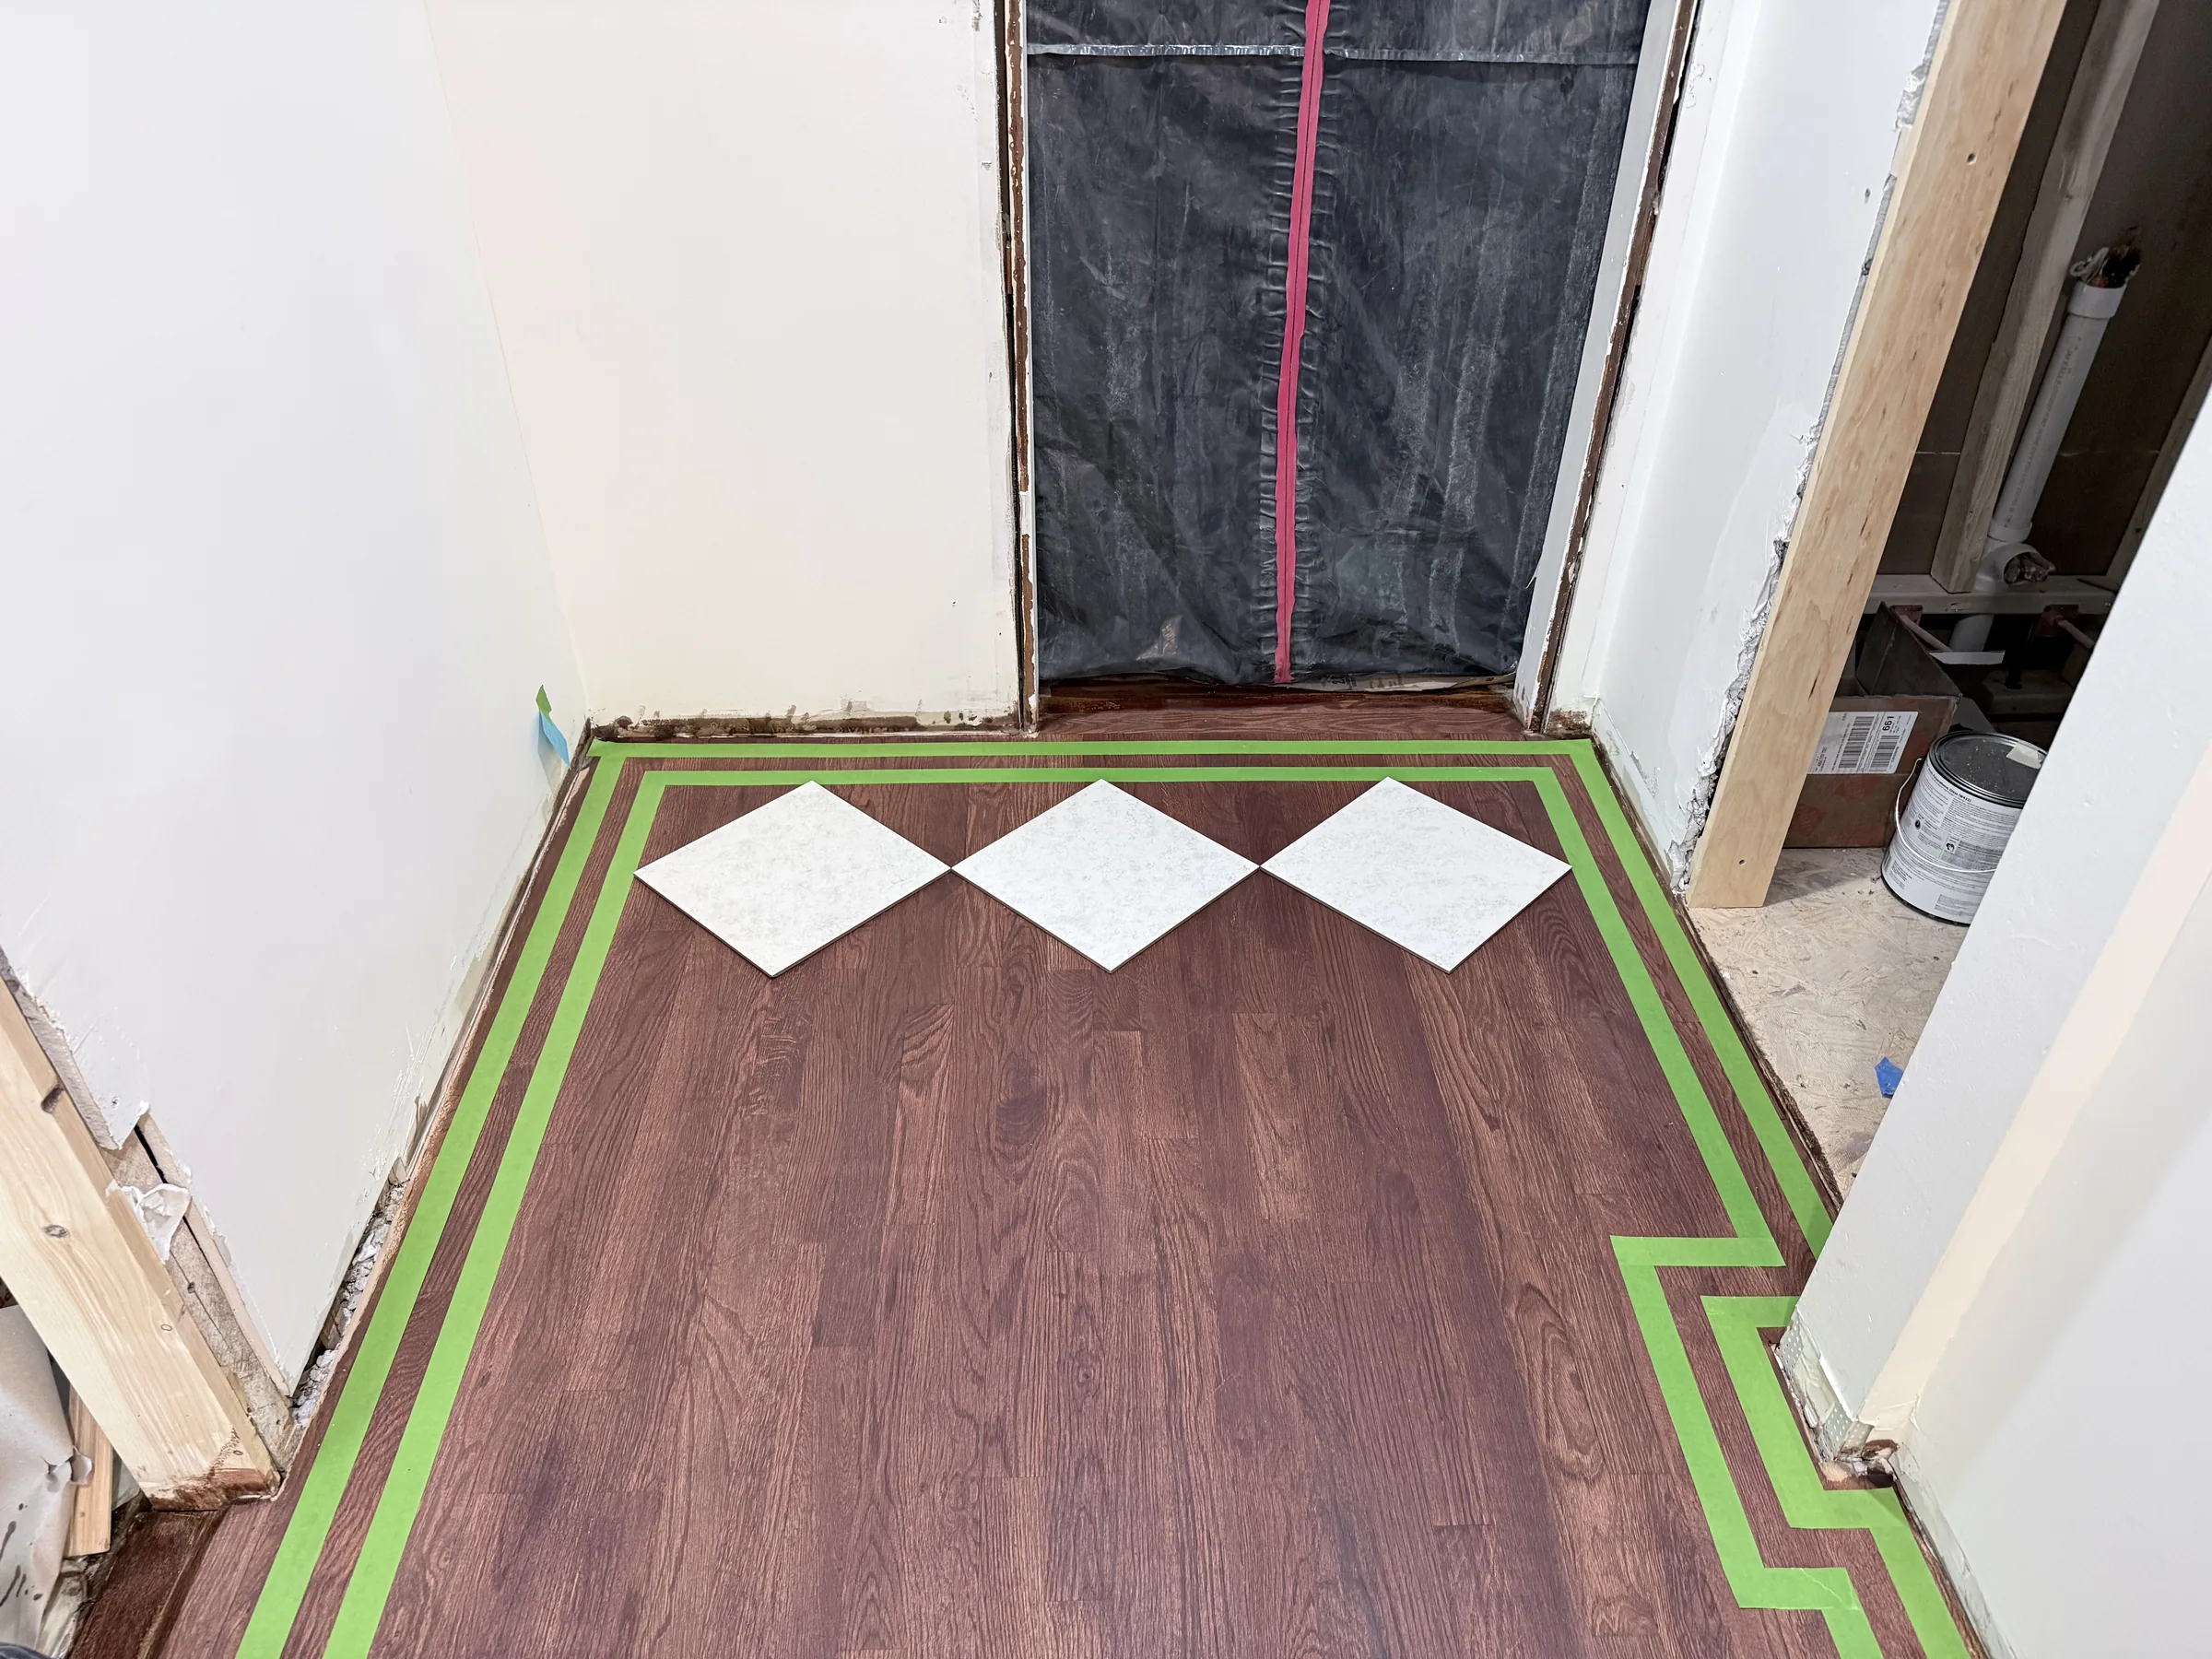
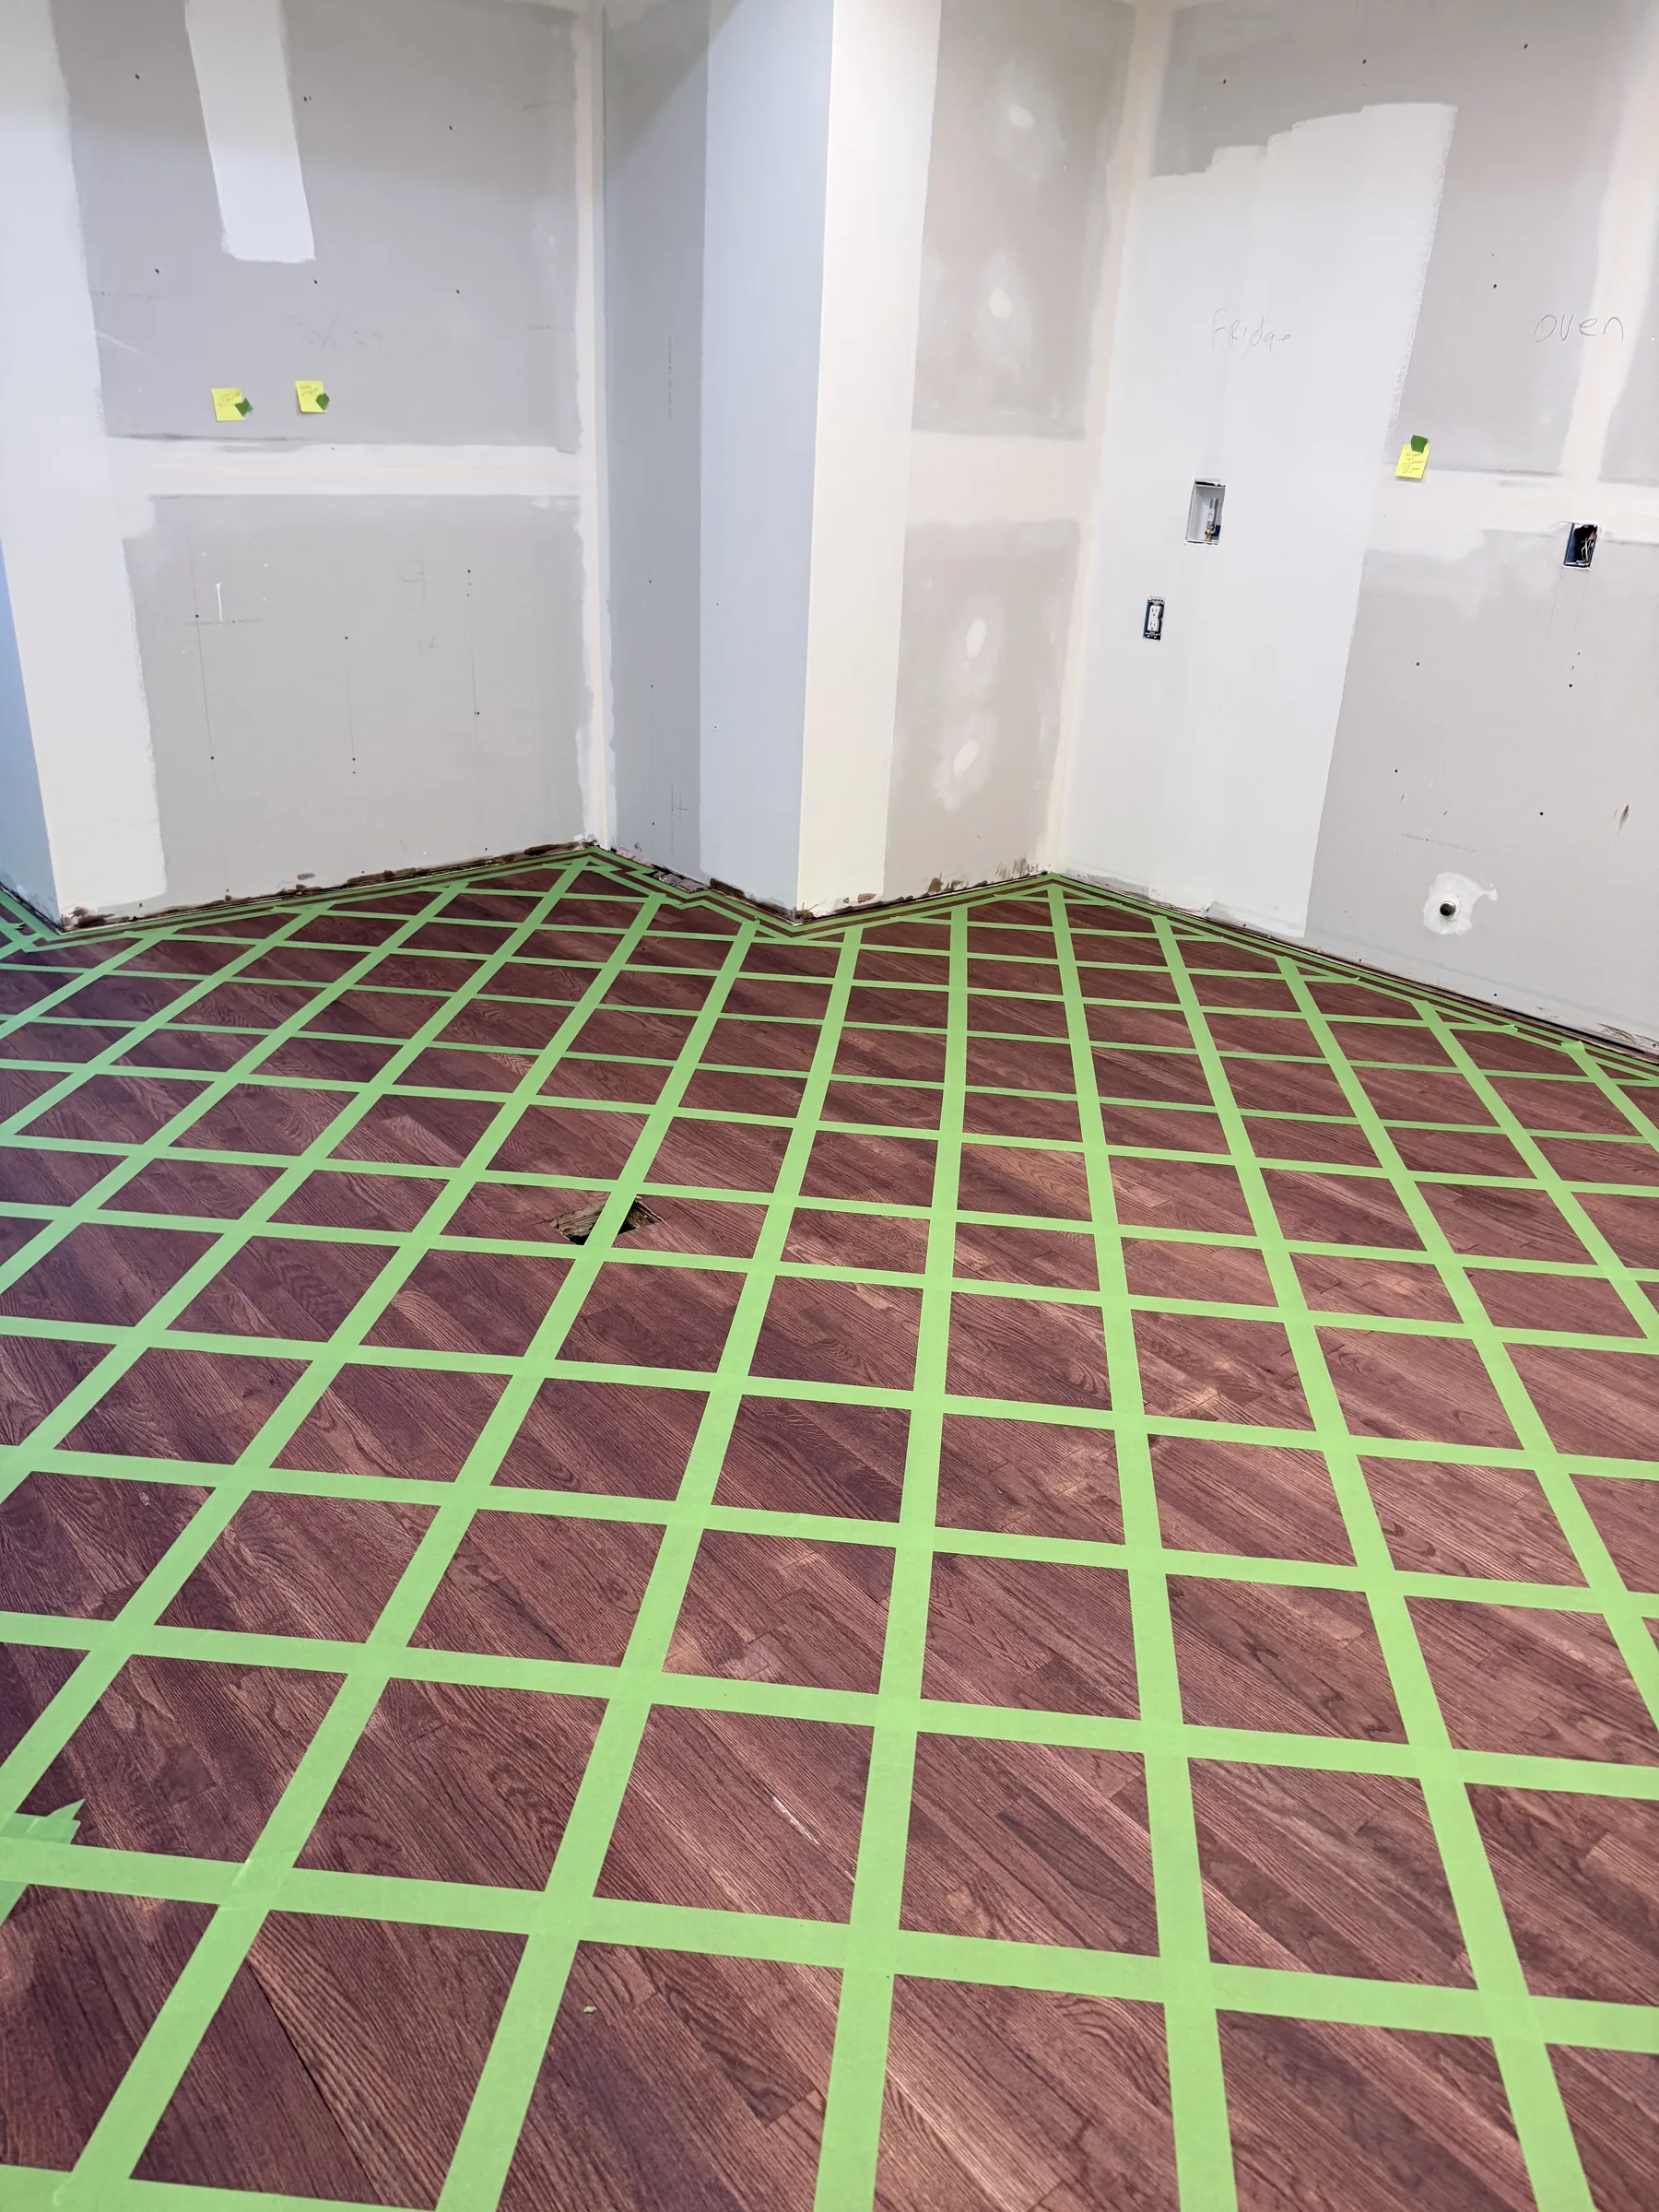
Lay out and tape a diagonal diamond grid sized and squared to the room
Refine and tighten the taped grid before painting
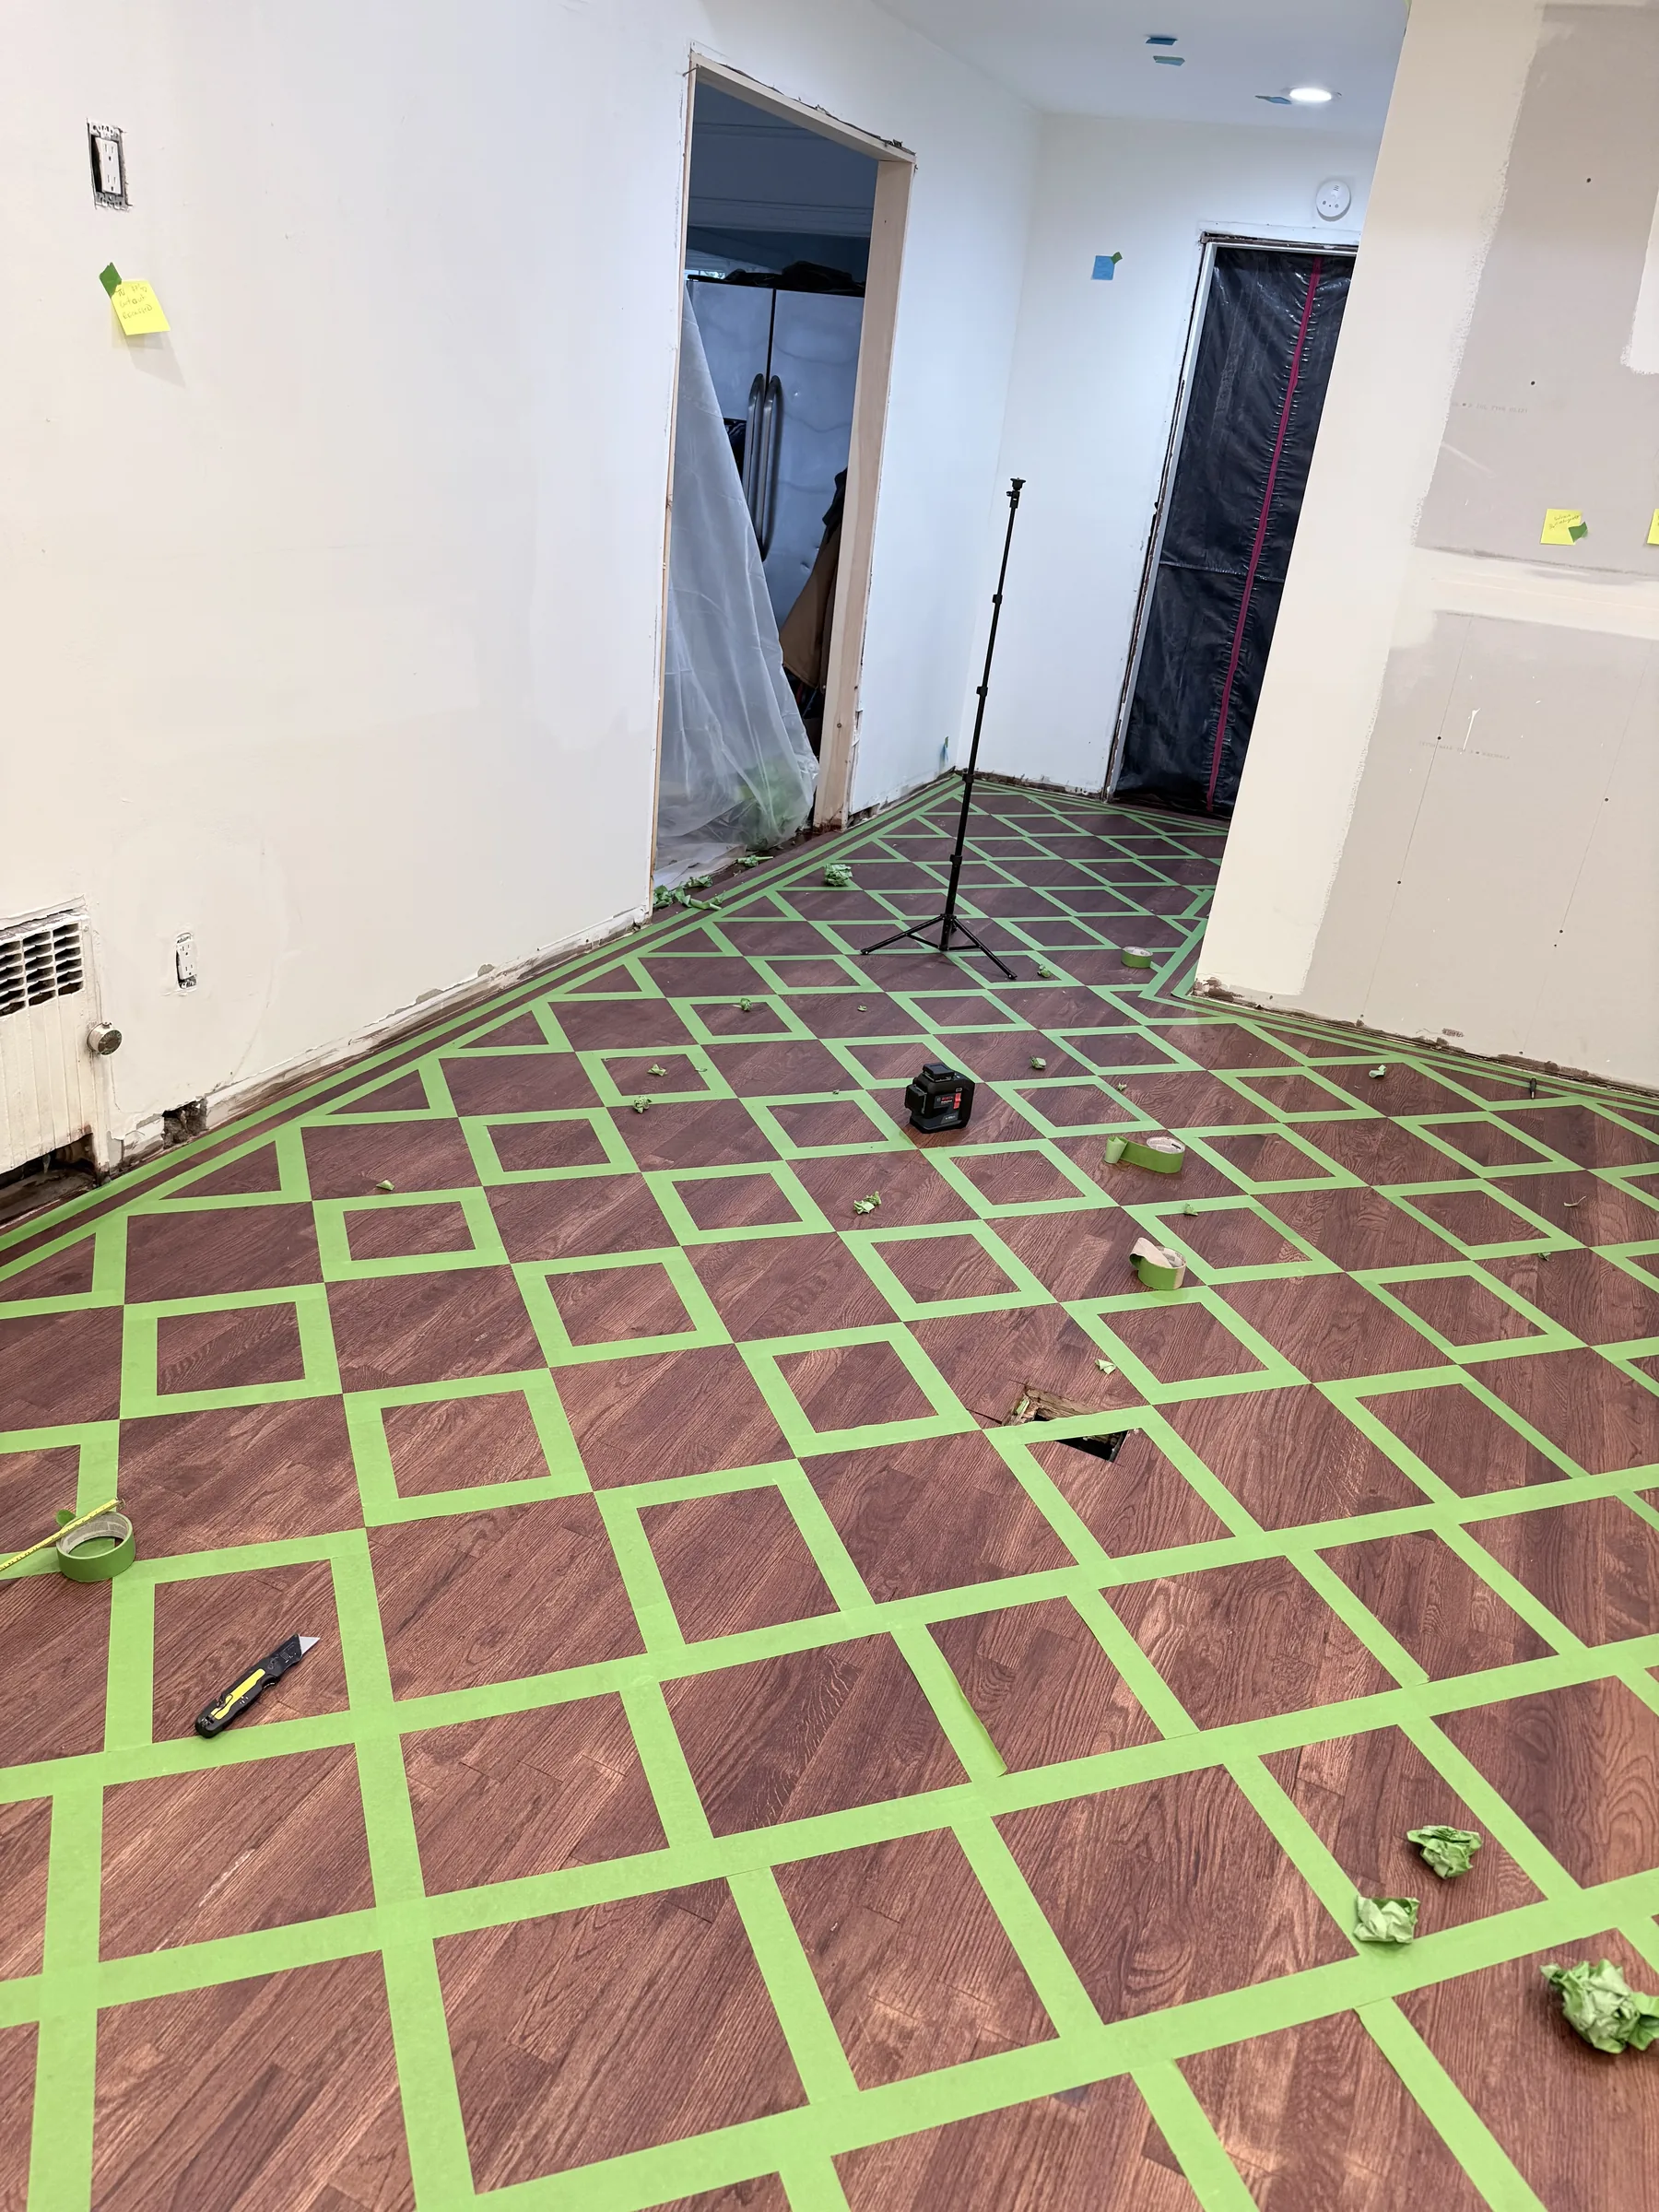
Paint the alternating diamonds in two coats
Remove the tape the same day, before the paint fully cured, for crisp edges
Apply a two-coat epoxy-based polyurethane topcoat to seal and protect the finish
Before and after
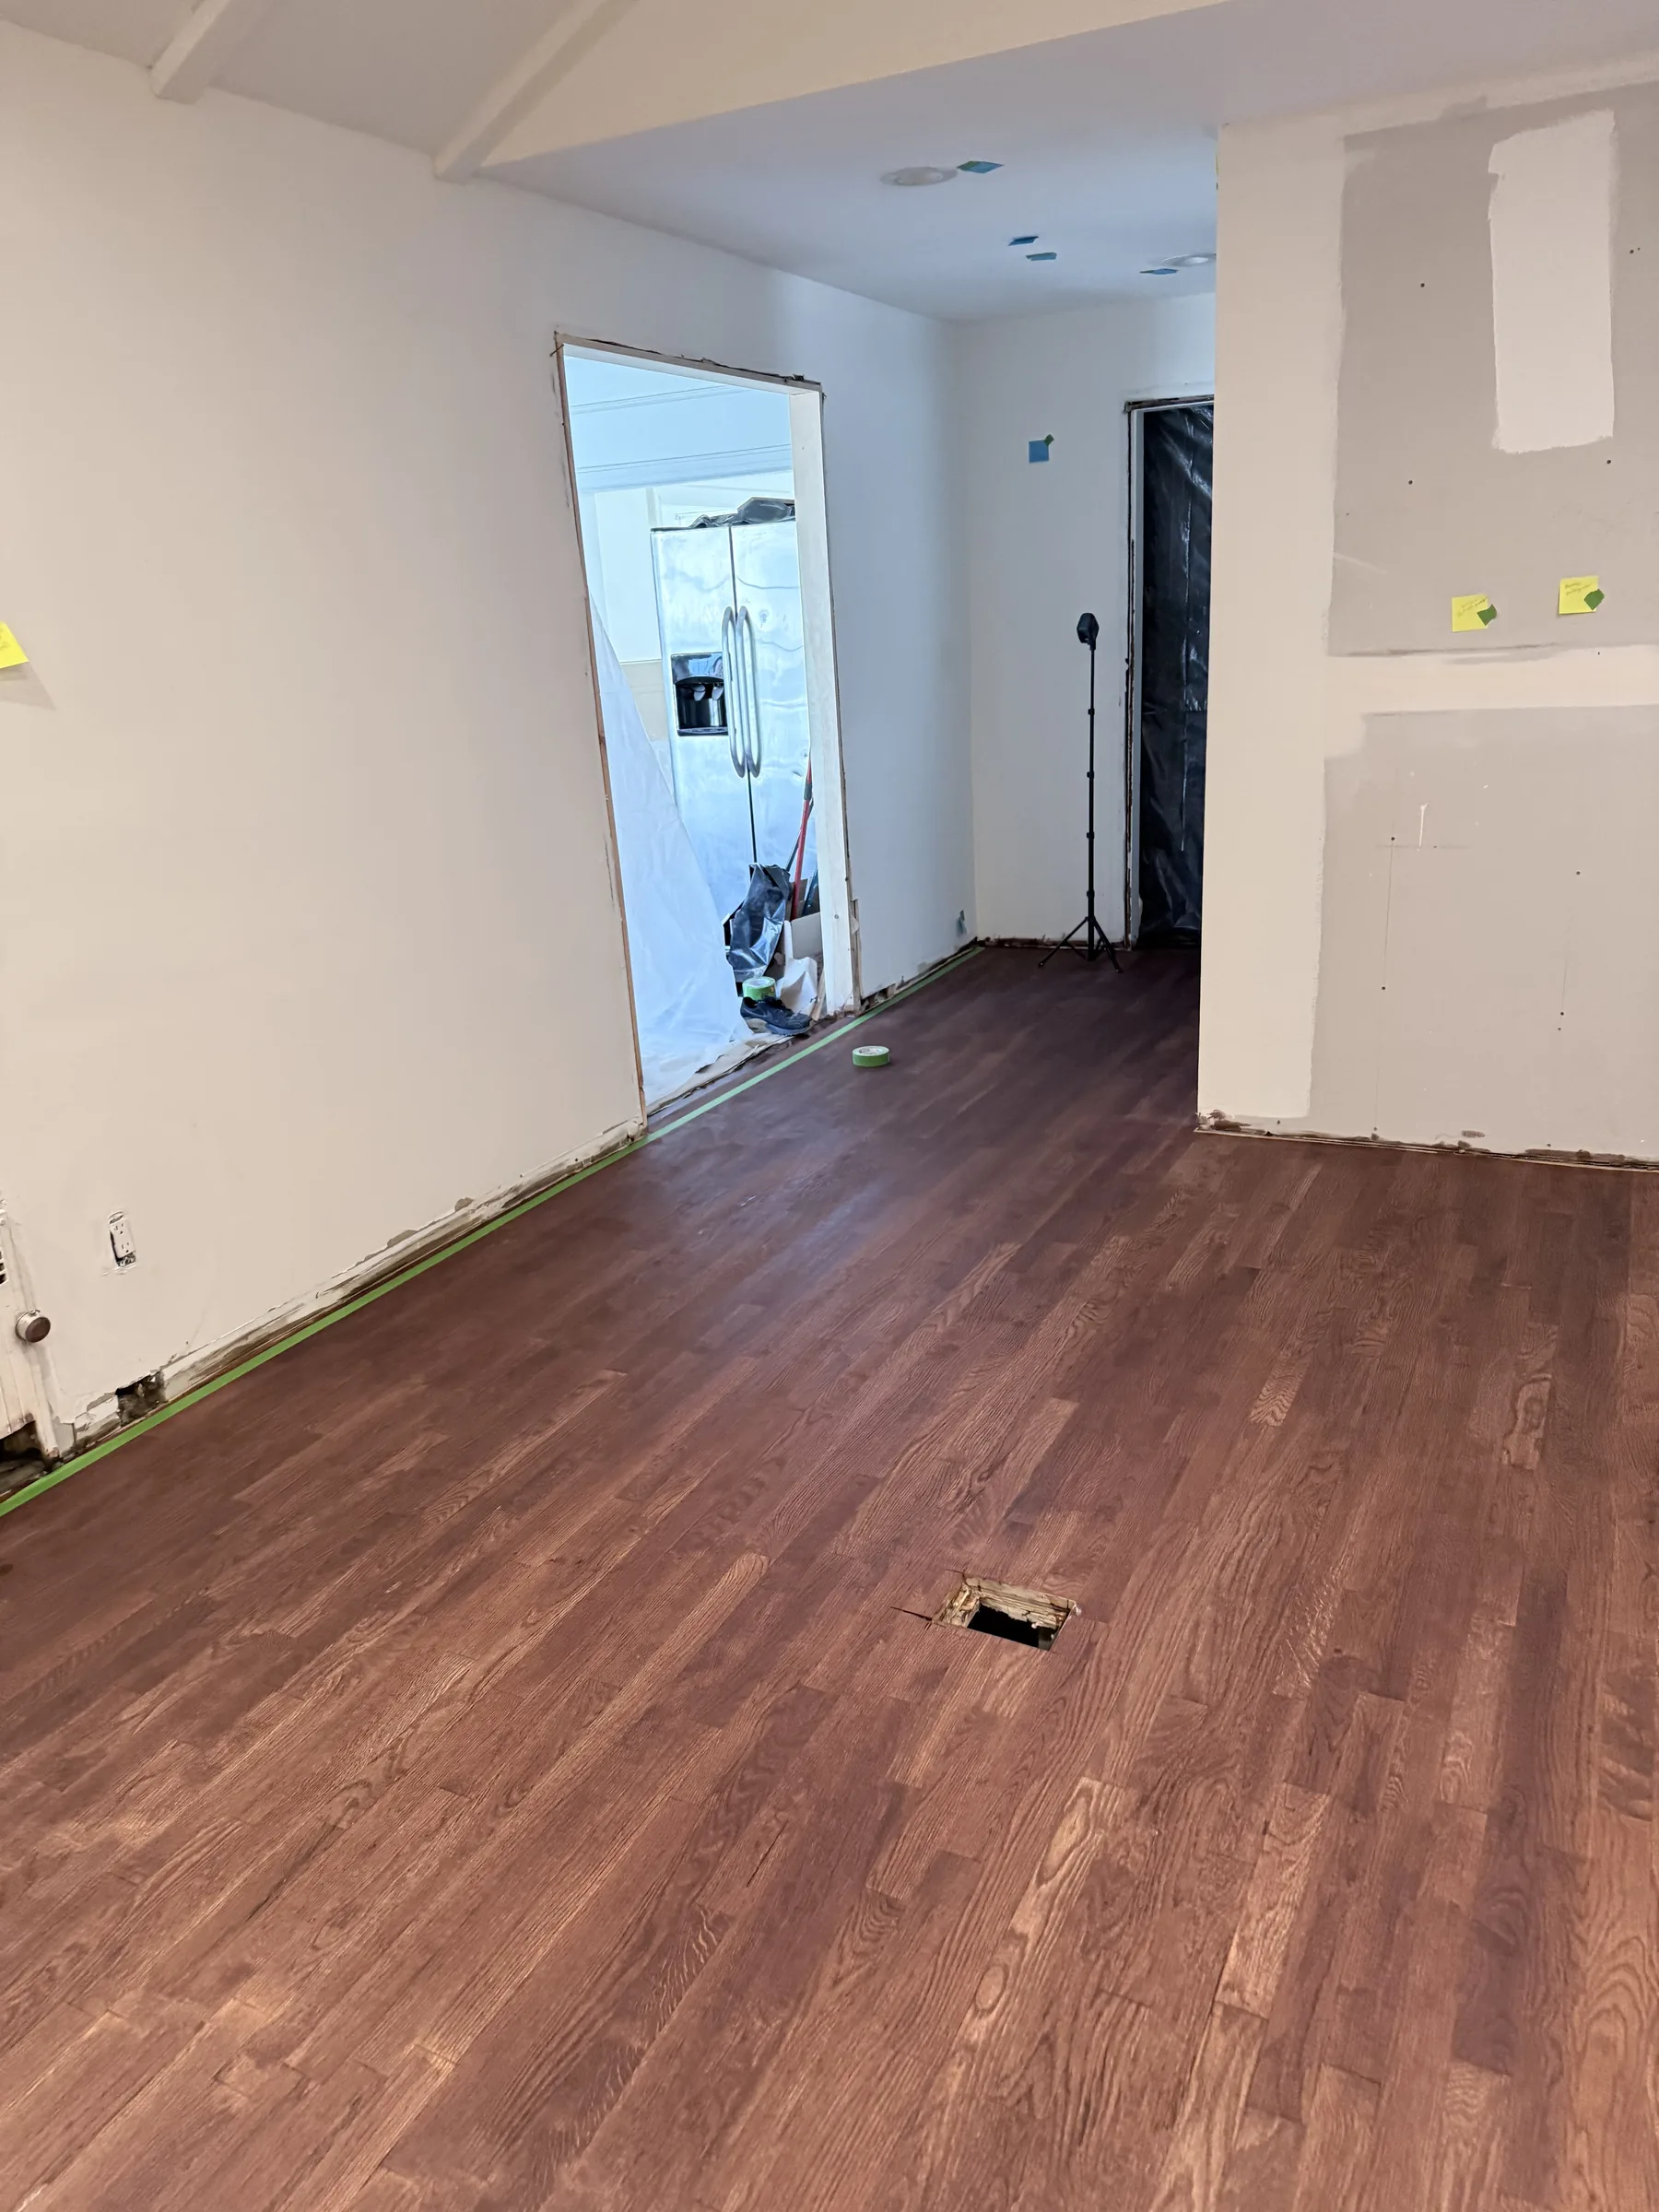
The same view — stained floor, then a chess pattern
Drag the handle to compare. Both photos are lined up to the same viewpoint, so only the floor changes — the covered window panel, the wall markers, and the small floor cutout stay in the same place.
The same viewpoint, before and after
BeforeAfter
Drag the slider left and right: the bare stained floor turns into the finished chess pattern. The walls, the corner, the covered window panel and the floor cutout stay in the same place — only the floor changes.
Before
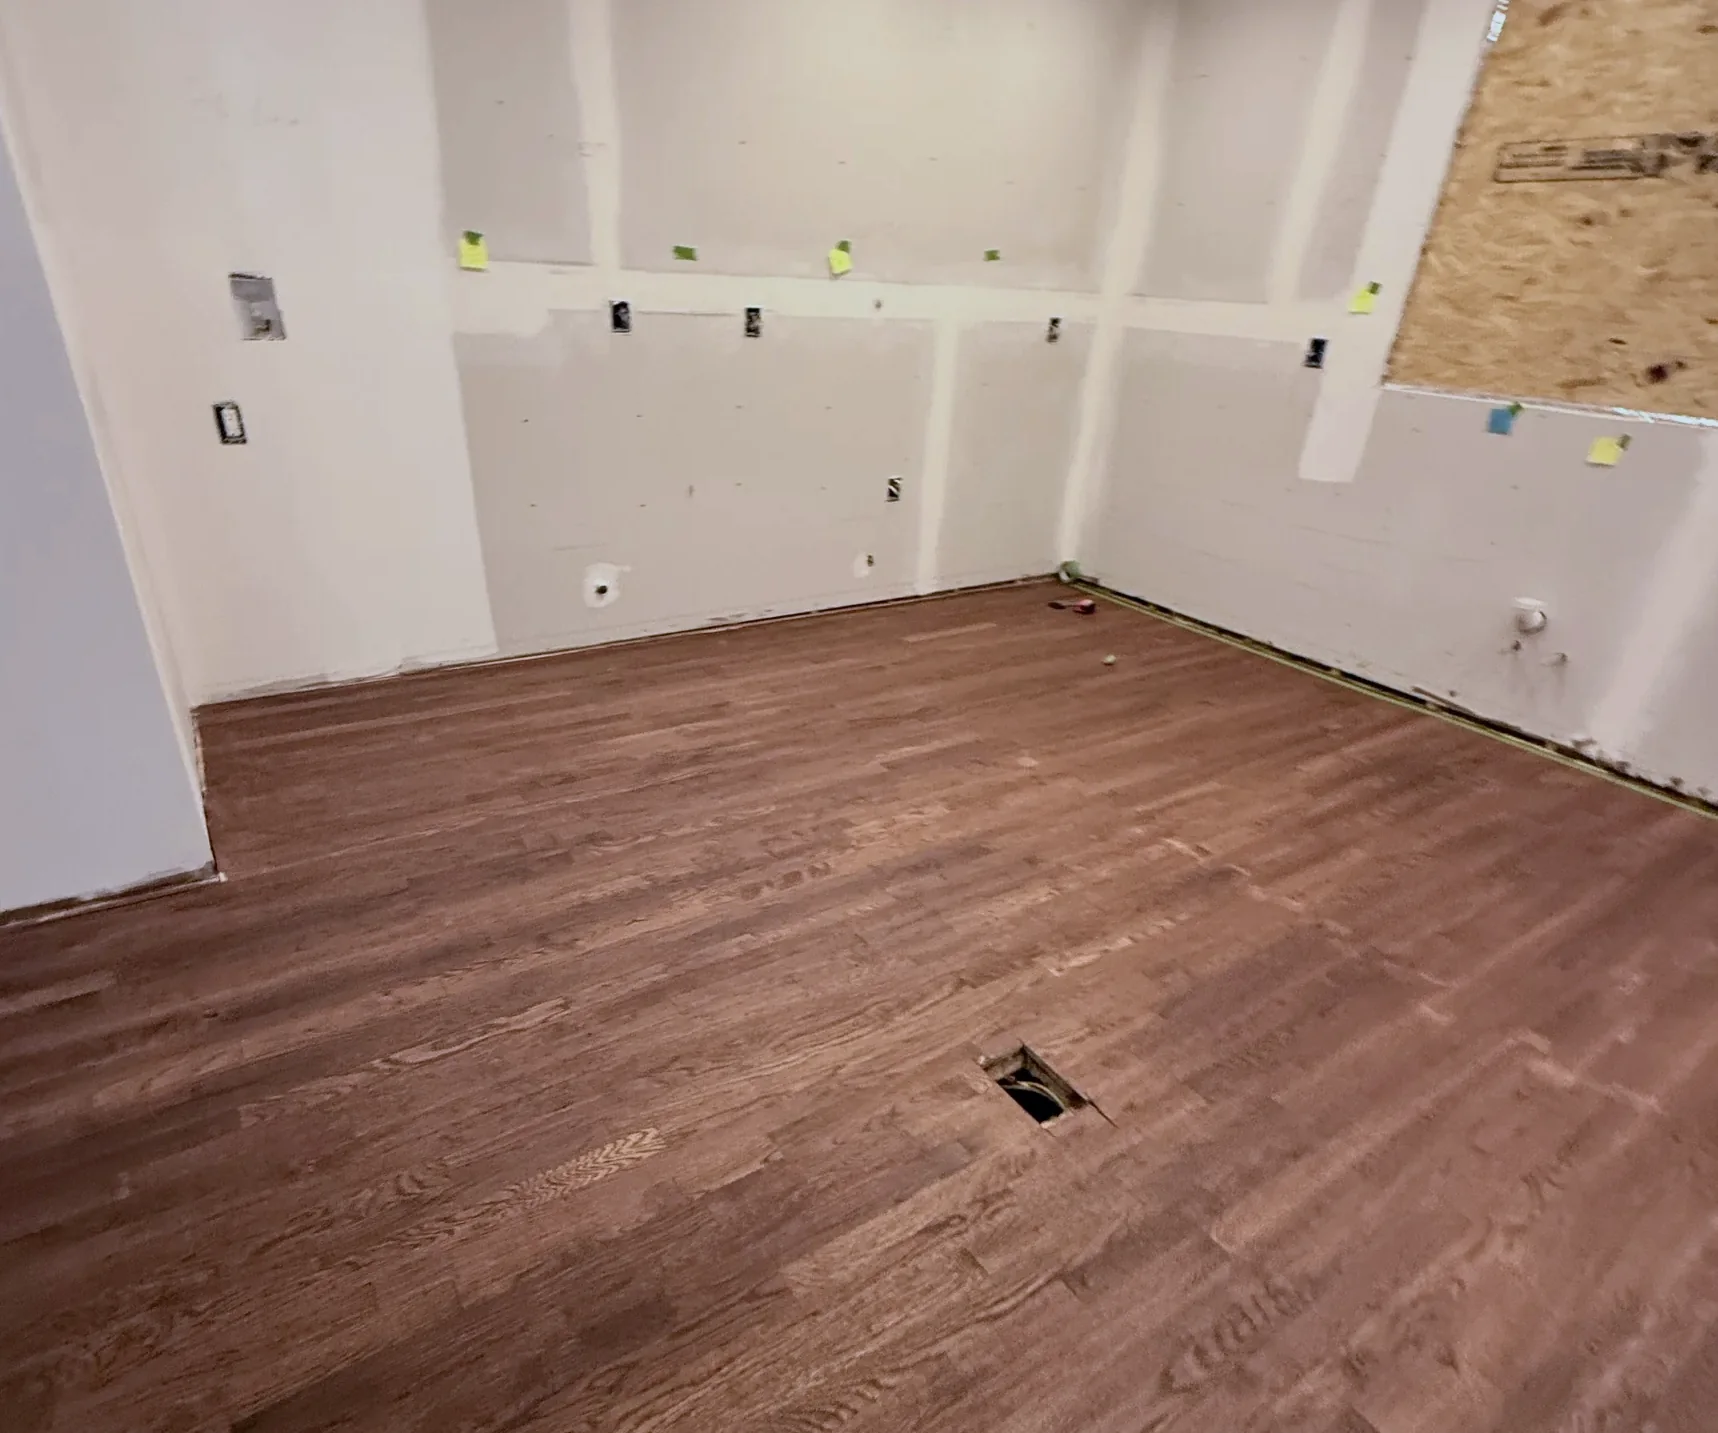
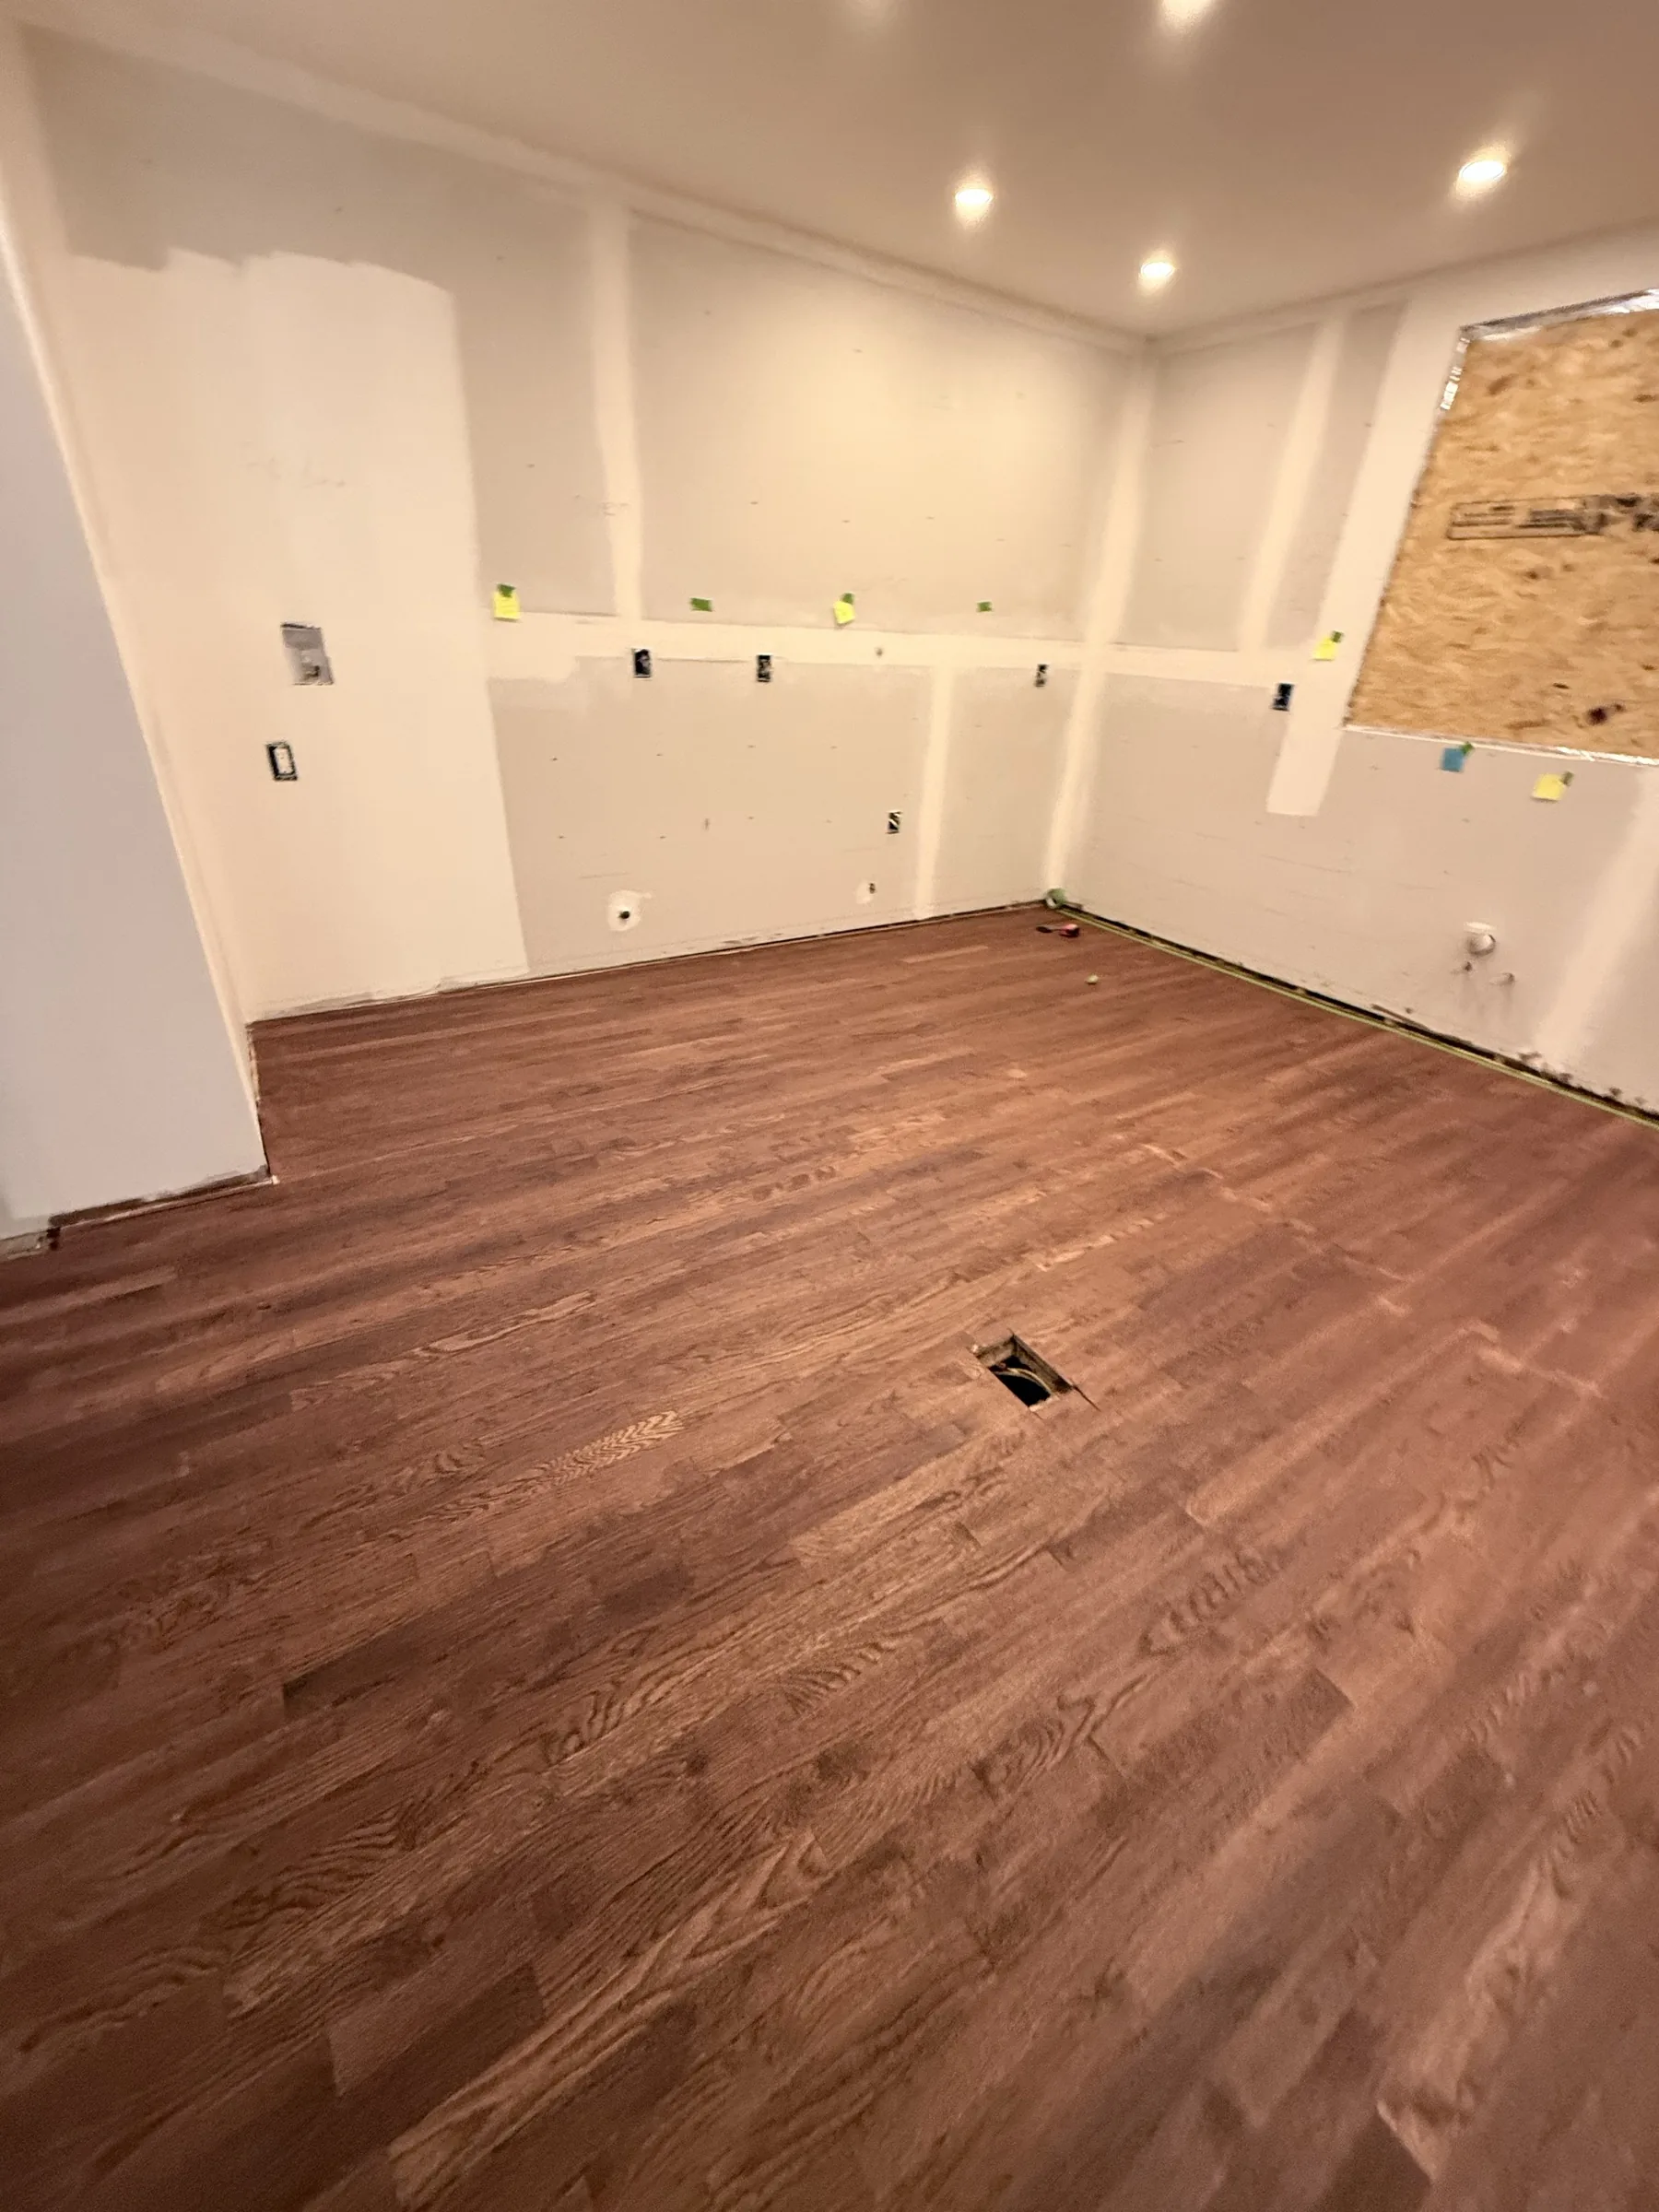
Before: a stained floor and a first attempt that missed the mark
The floor was already stained. An earlier chess-pattern paint job hadn't turned out clean, so the layout started fresh.
The bare stained floor before the layout began — the base color for the pattern.The starting point: a plain stained wood floor, before the new layout began.
Painting process
Tape, paint, pull the tape, then seal
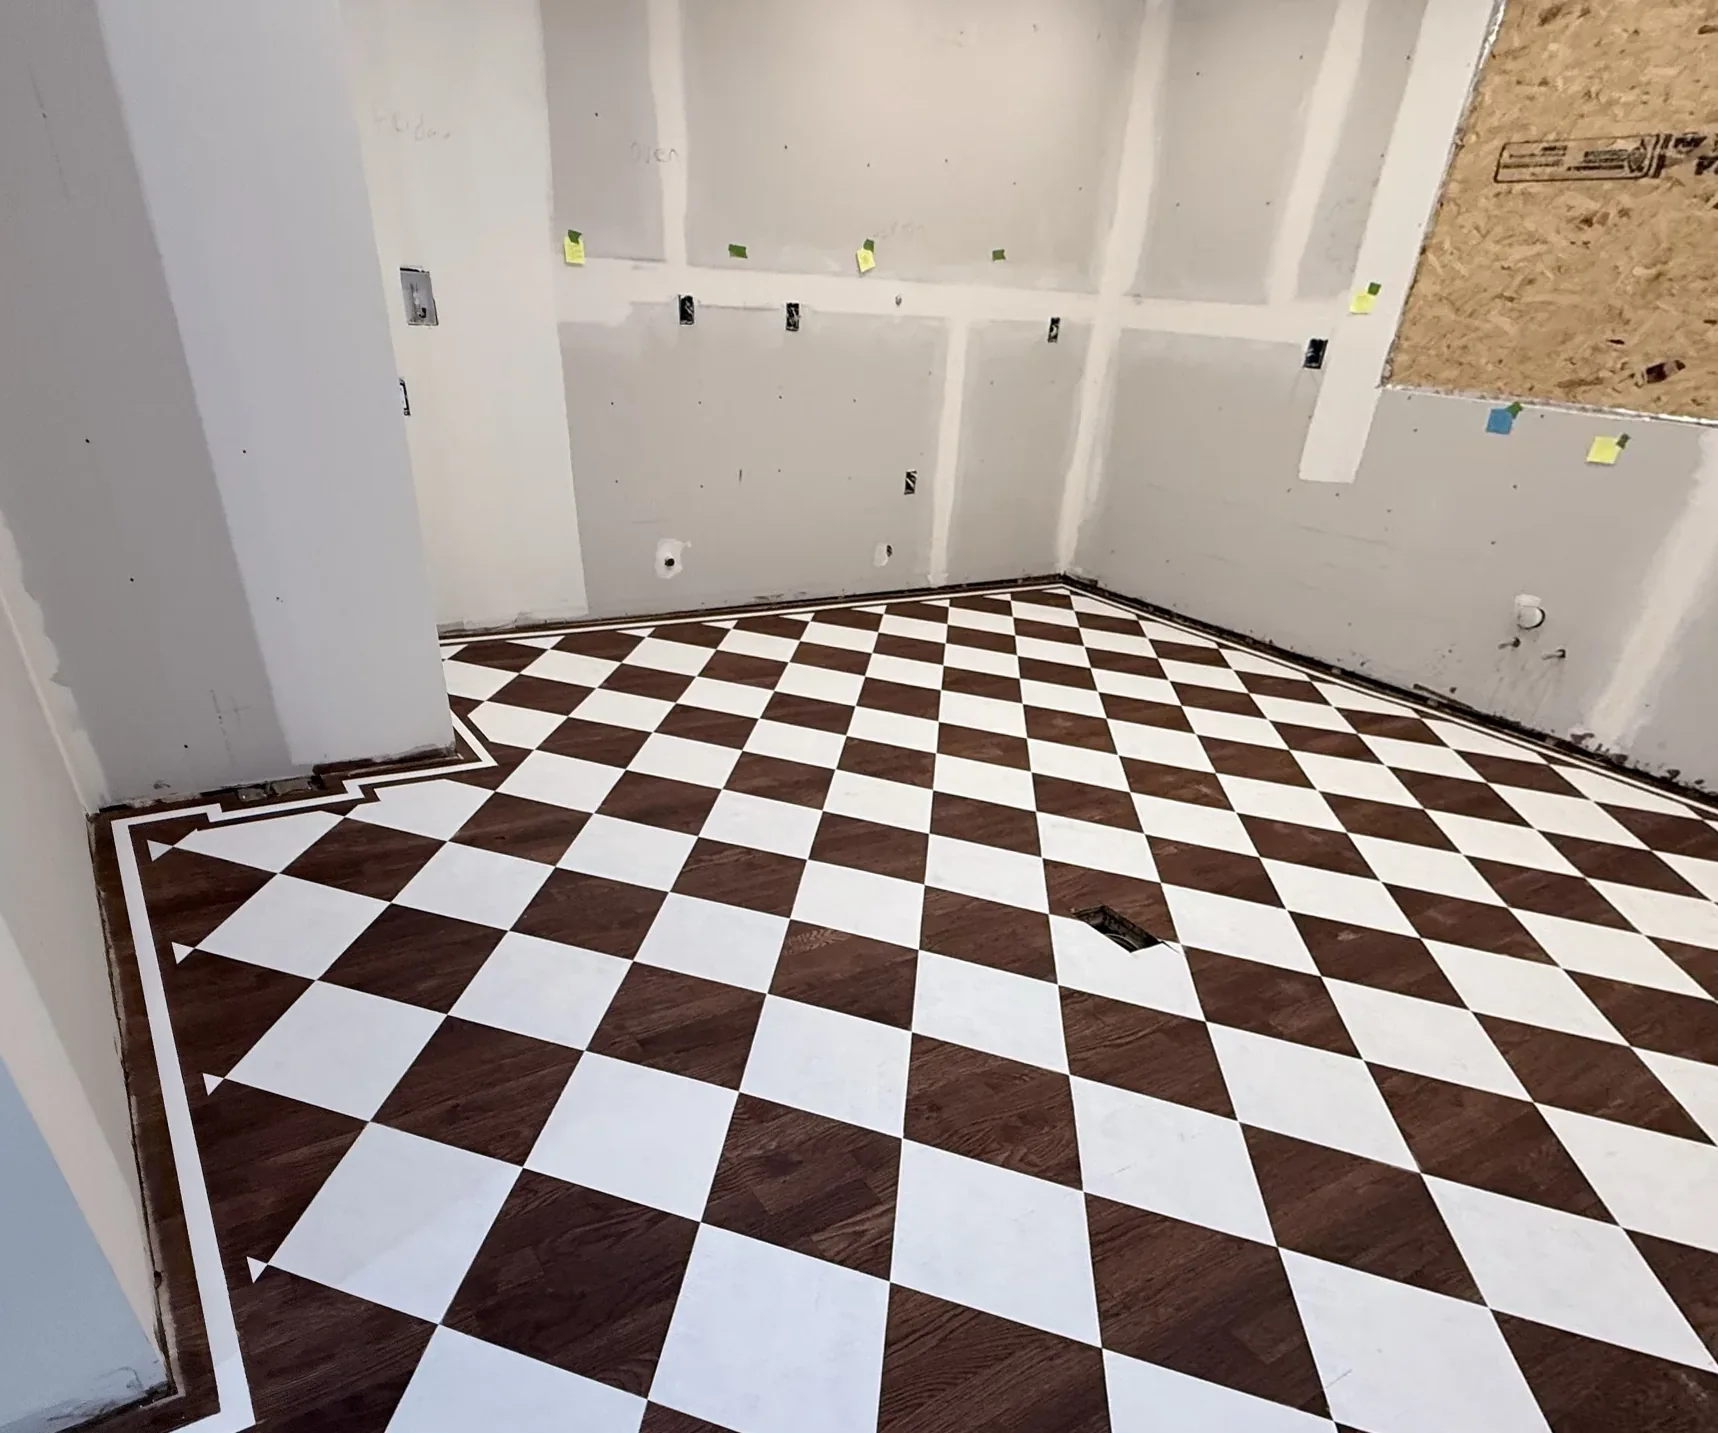
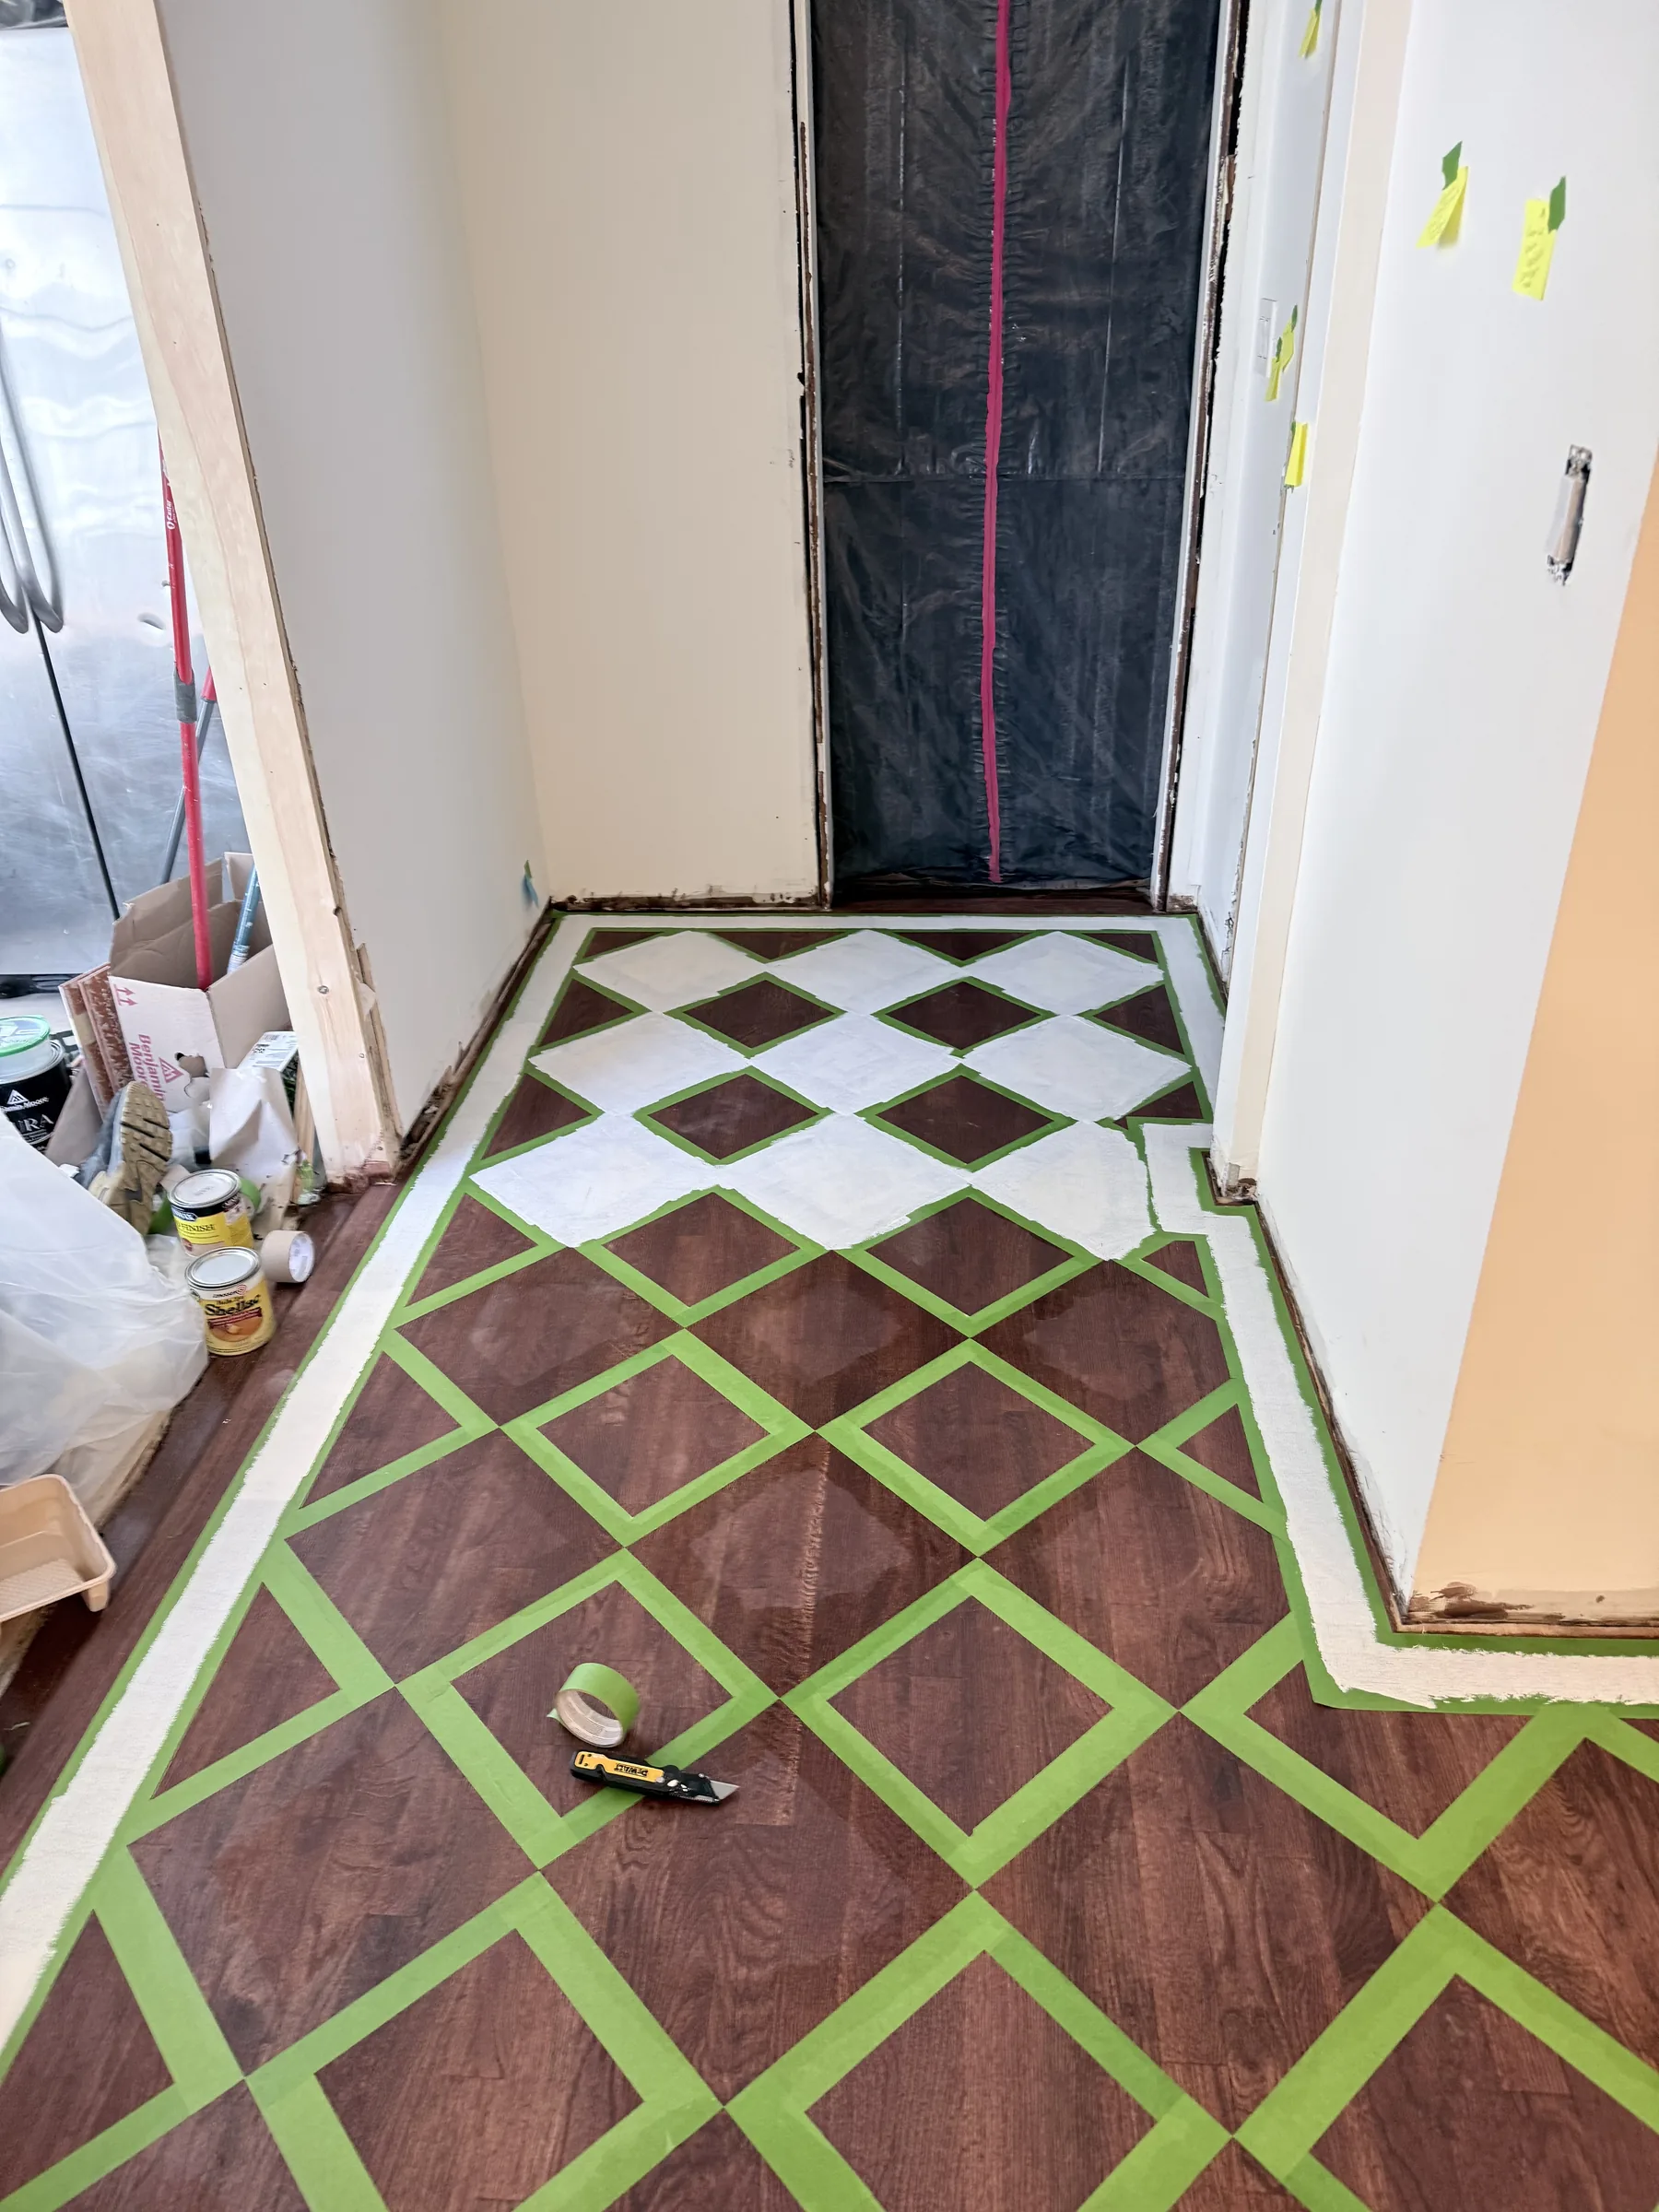
The diagonal diamond grid was taped out across the room on the first visit, using template tiles to set the pattern scale, then refined and tightened on a second visit before any paint went down.
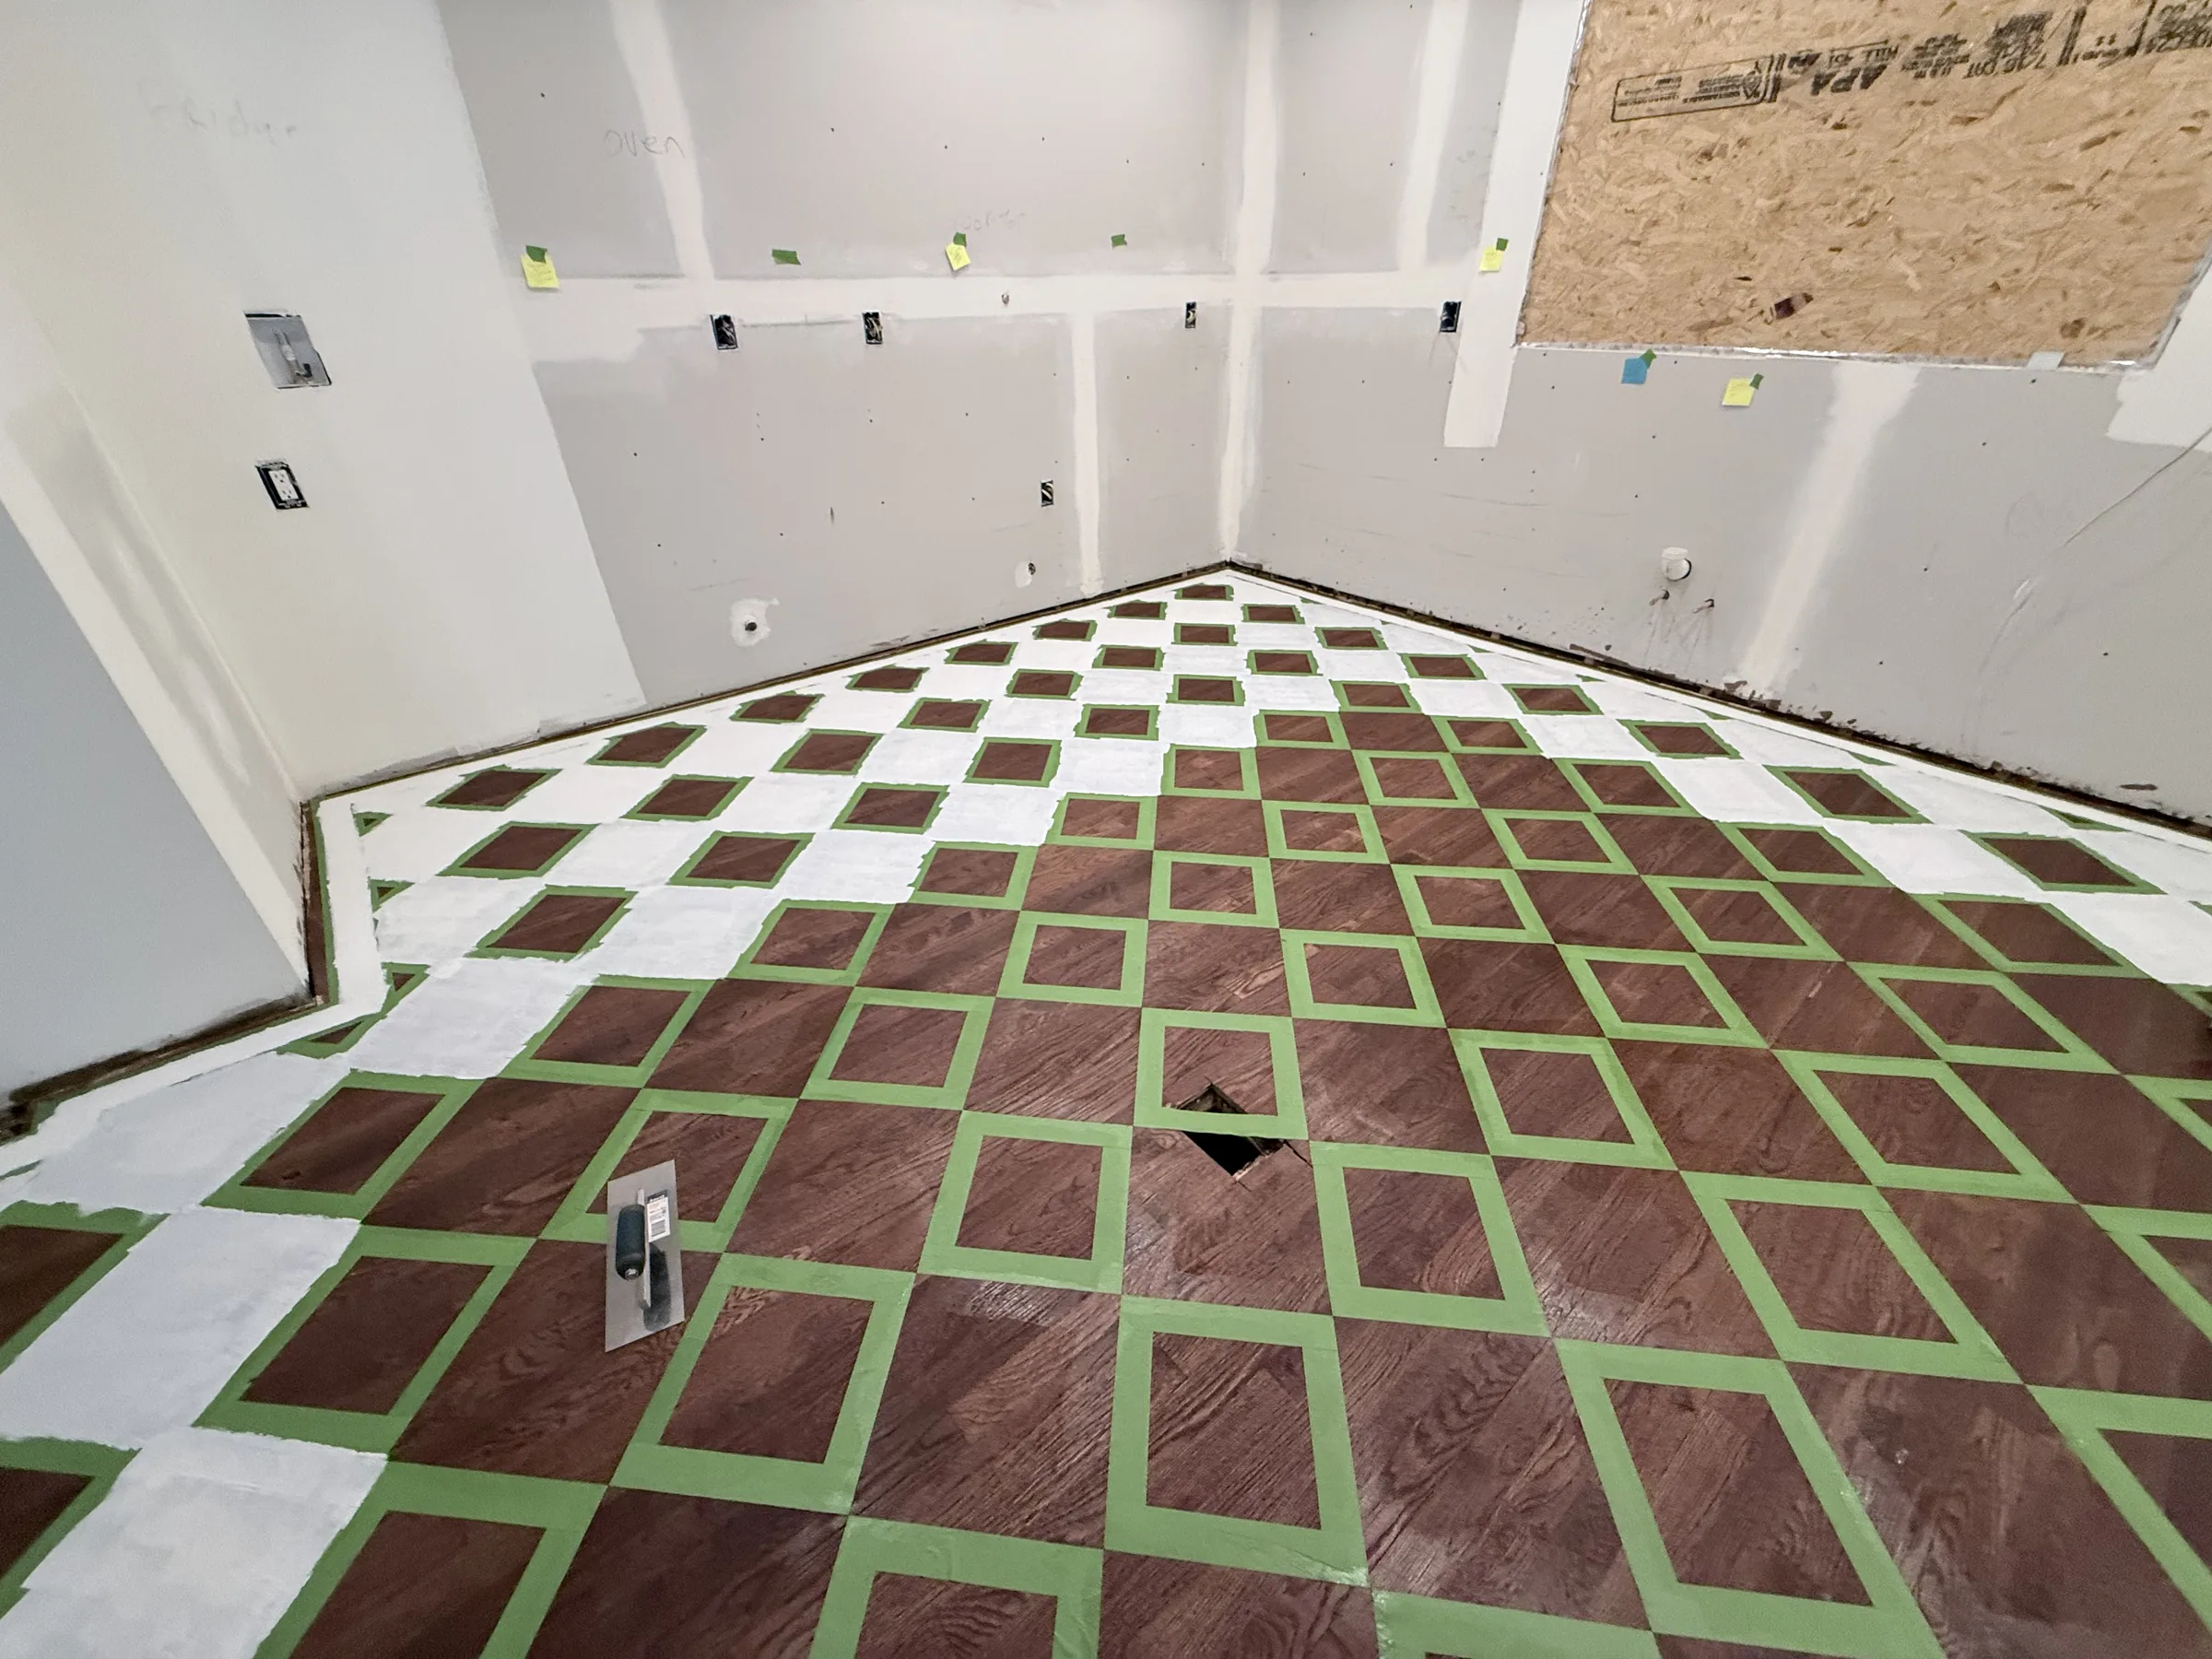
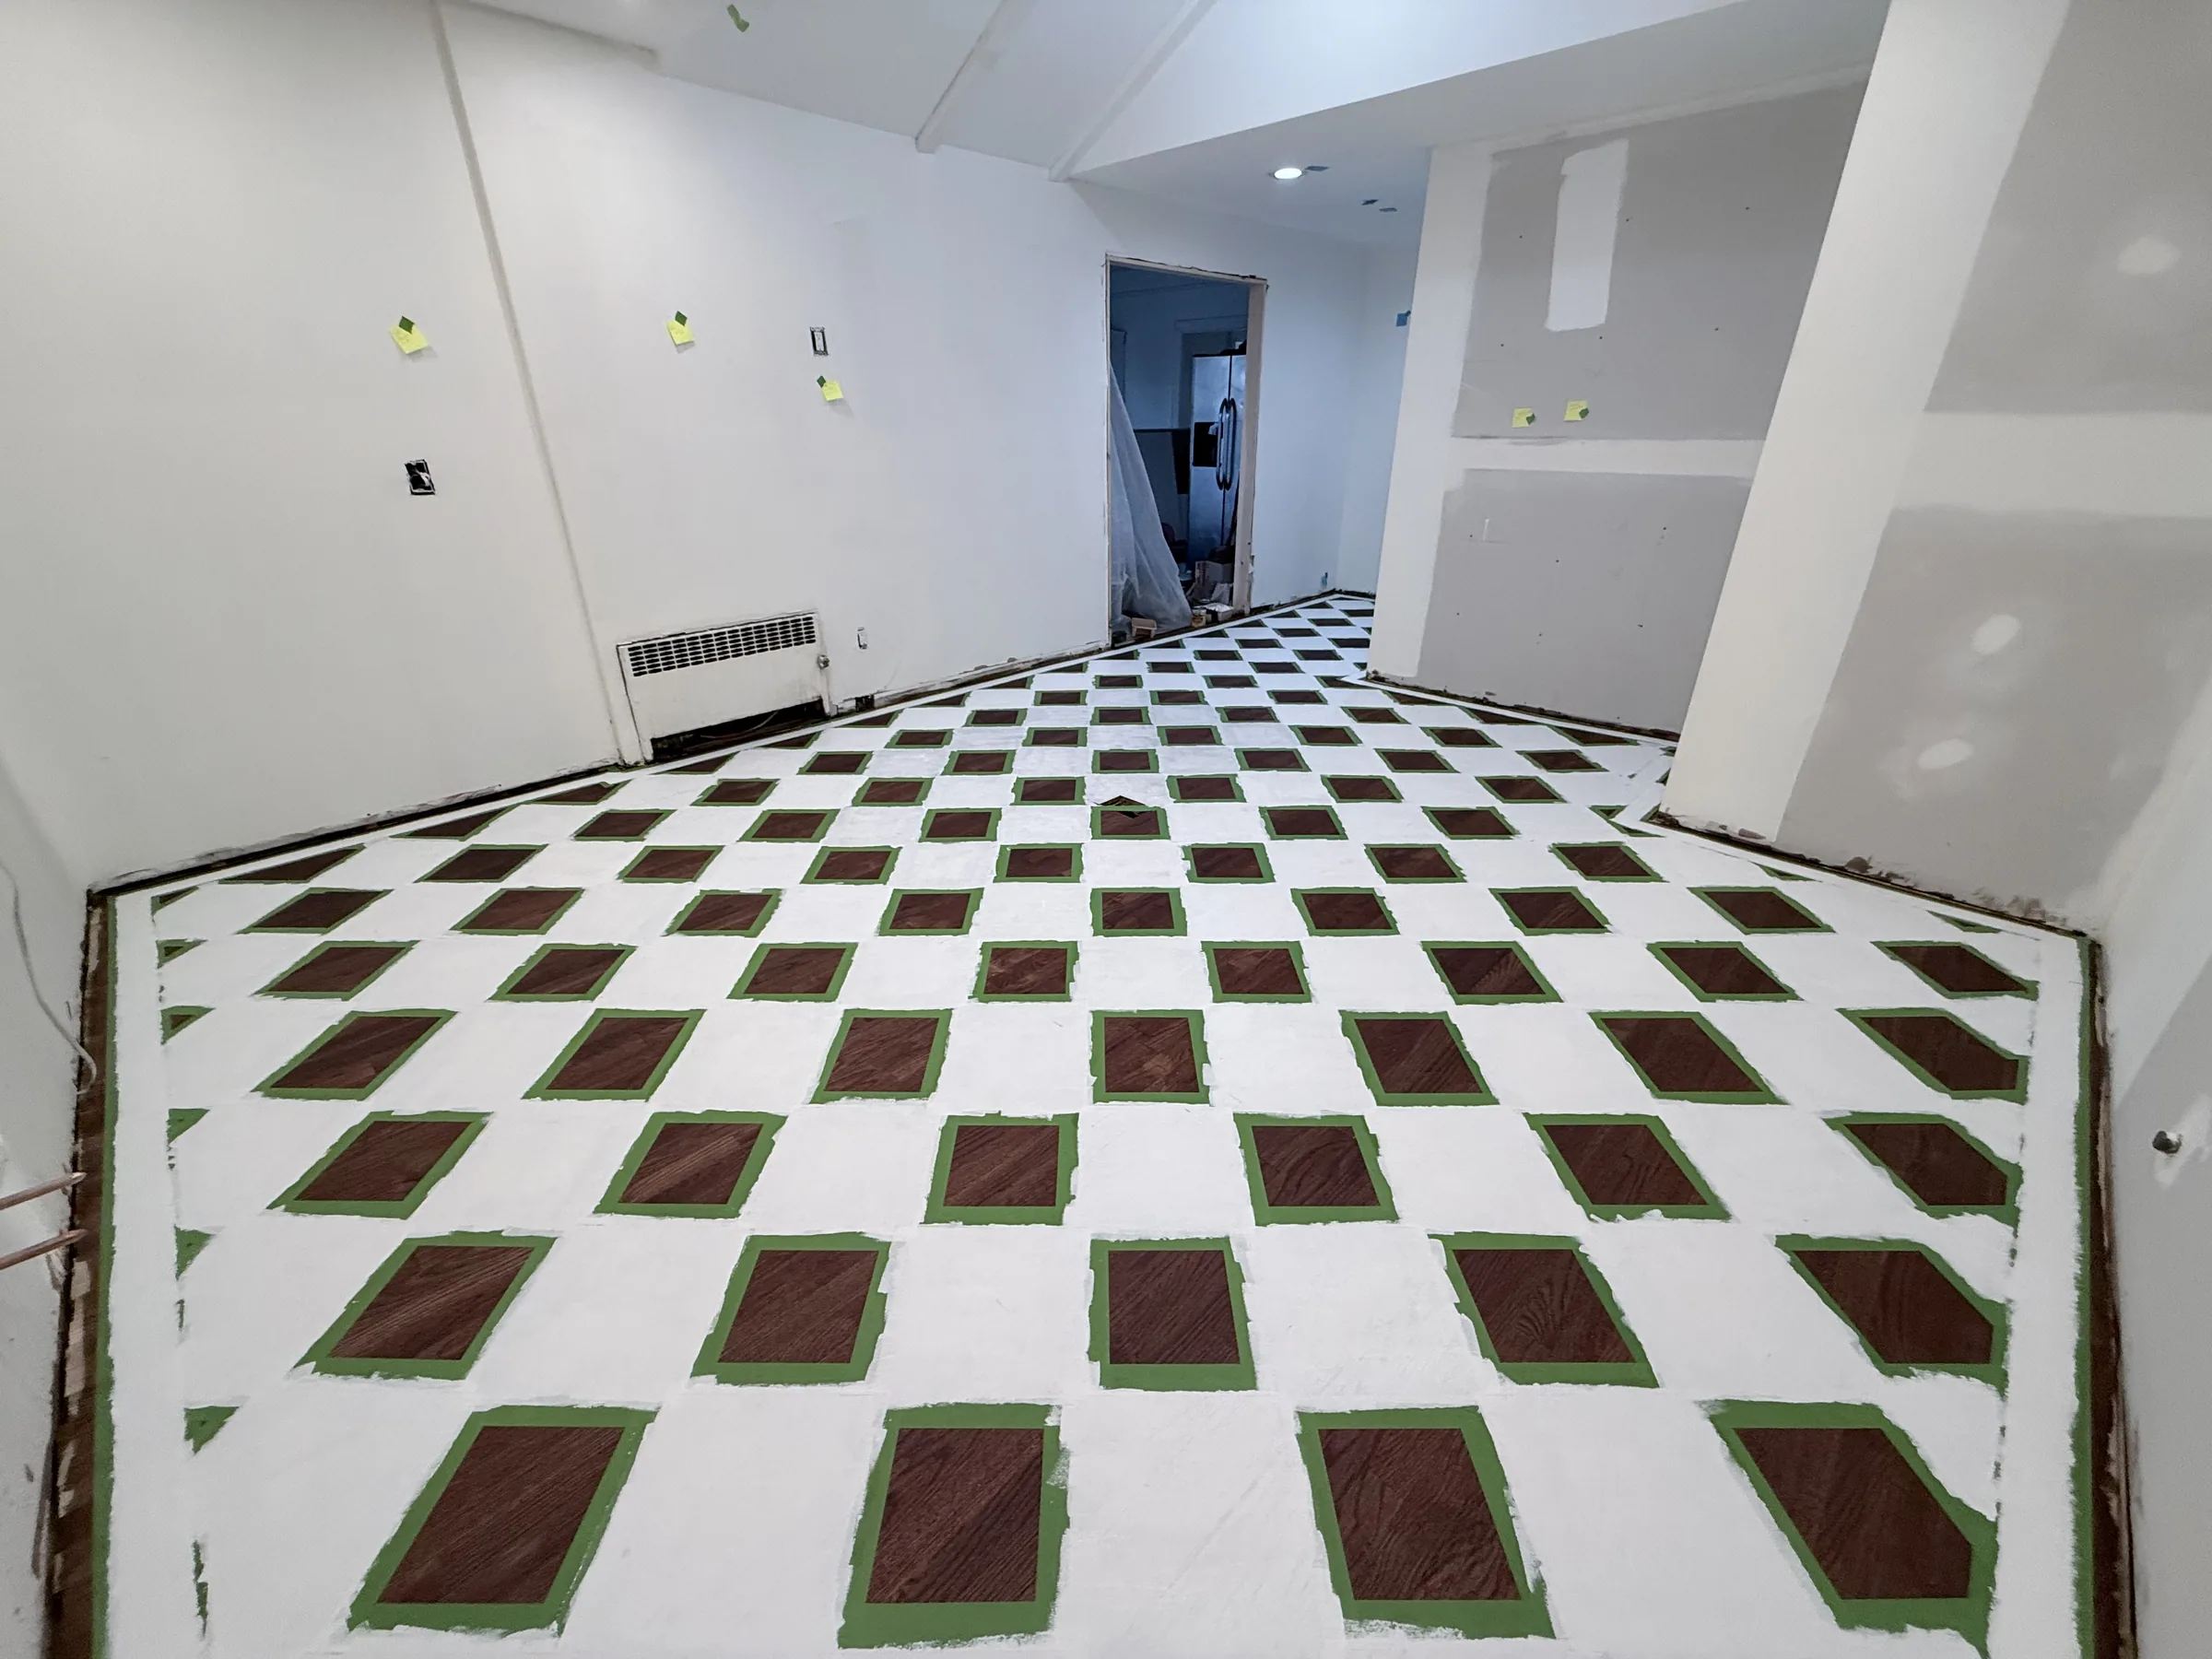
On the third visit, the alternating diamonds were painted in two coats. The tape came off the same day, while the paint was still fresh enough to pull clean lines instead of chipped edges.
Once the paint had fully cured, a two-coat epoxy-based polyurethane topcoat sealed the whole floor for a durable, glossy finish.
Process
Process: from taped grid to sealed chess pattern
Four visits, a few hours each: layout, taping, painting, and the epoxy topcoat.
Day one: template tiles set the size of the diamond pattern before any tape went down.The diagonal grid taped out across the whole room, squared to the walls.Day two: the grid was tightened and refined before painting began.Day three: paint went on the alternating diamonds, starting corner by corner.The checkerboard pattern took shape as more of the room was painted.The tape came off the same day, while the paint was still fresh, for clean diamond edges.Day four: the painted pattern, cured and ready for the topcoat.
Why four visits
Drying time, not full days, set the schedule
Each visit only ran a few hours rather than a full day, and the schedule was built around drying and cure time between stages: the tape grid needed to be set before painting, the paint needed to hold its edge before the tape came off, and the paint needed to fully cure before the topcoat went on.
Pulling the tape the same day as painting — rather than waiting until the paint fully cured — was the key step for clean diamond edges instead of chipped or torn lines.
After
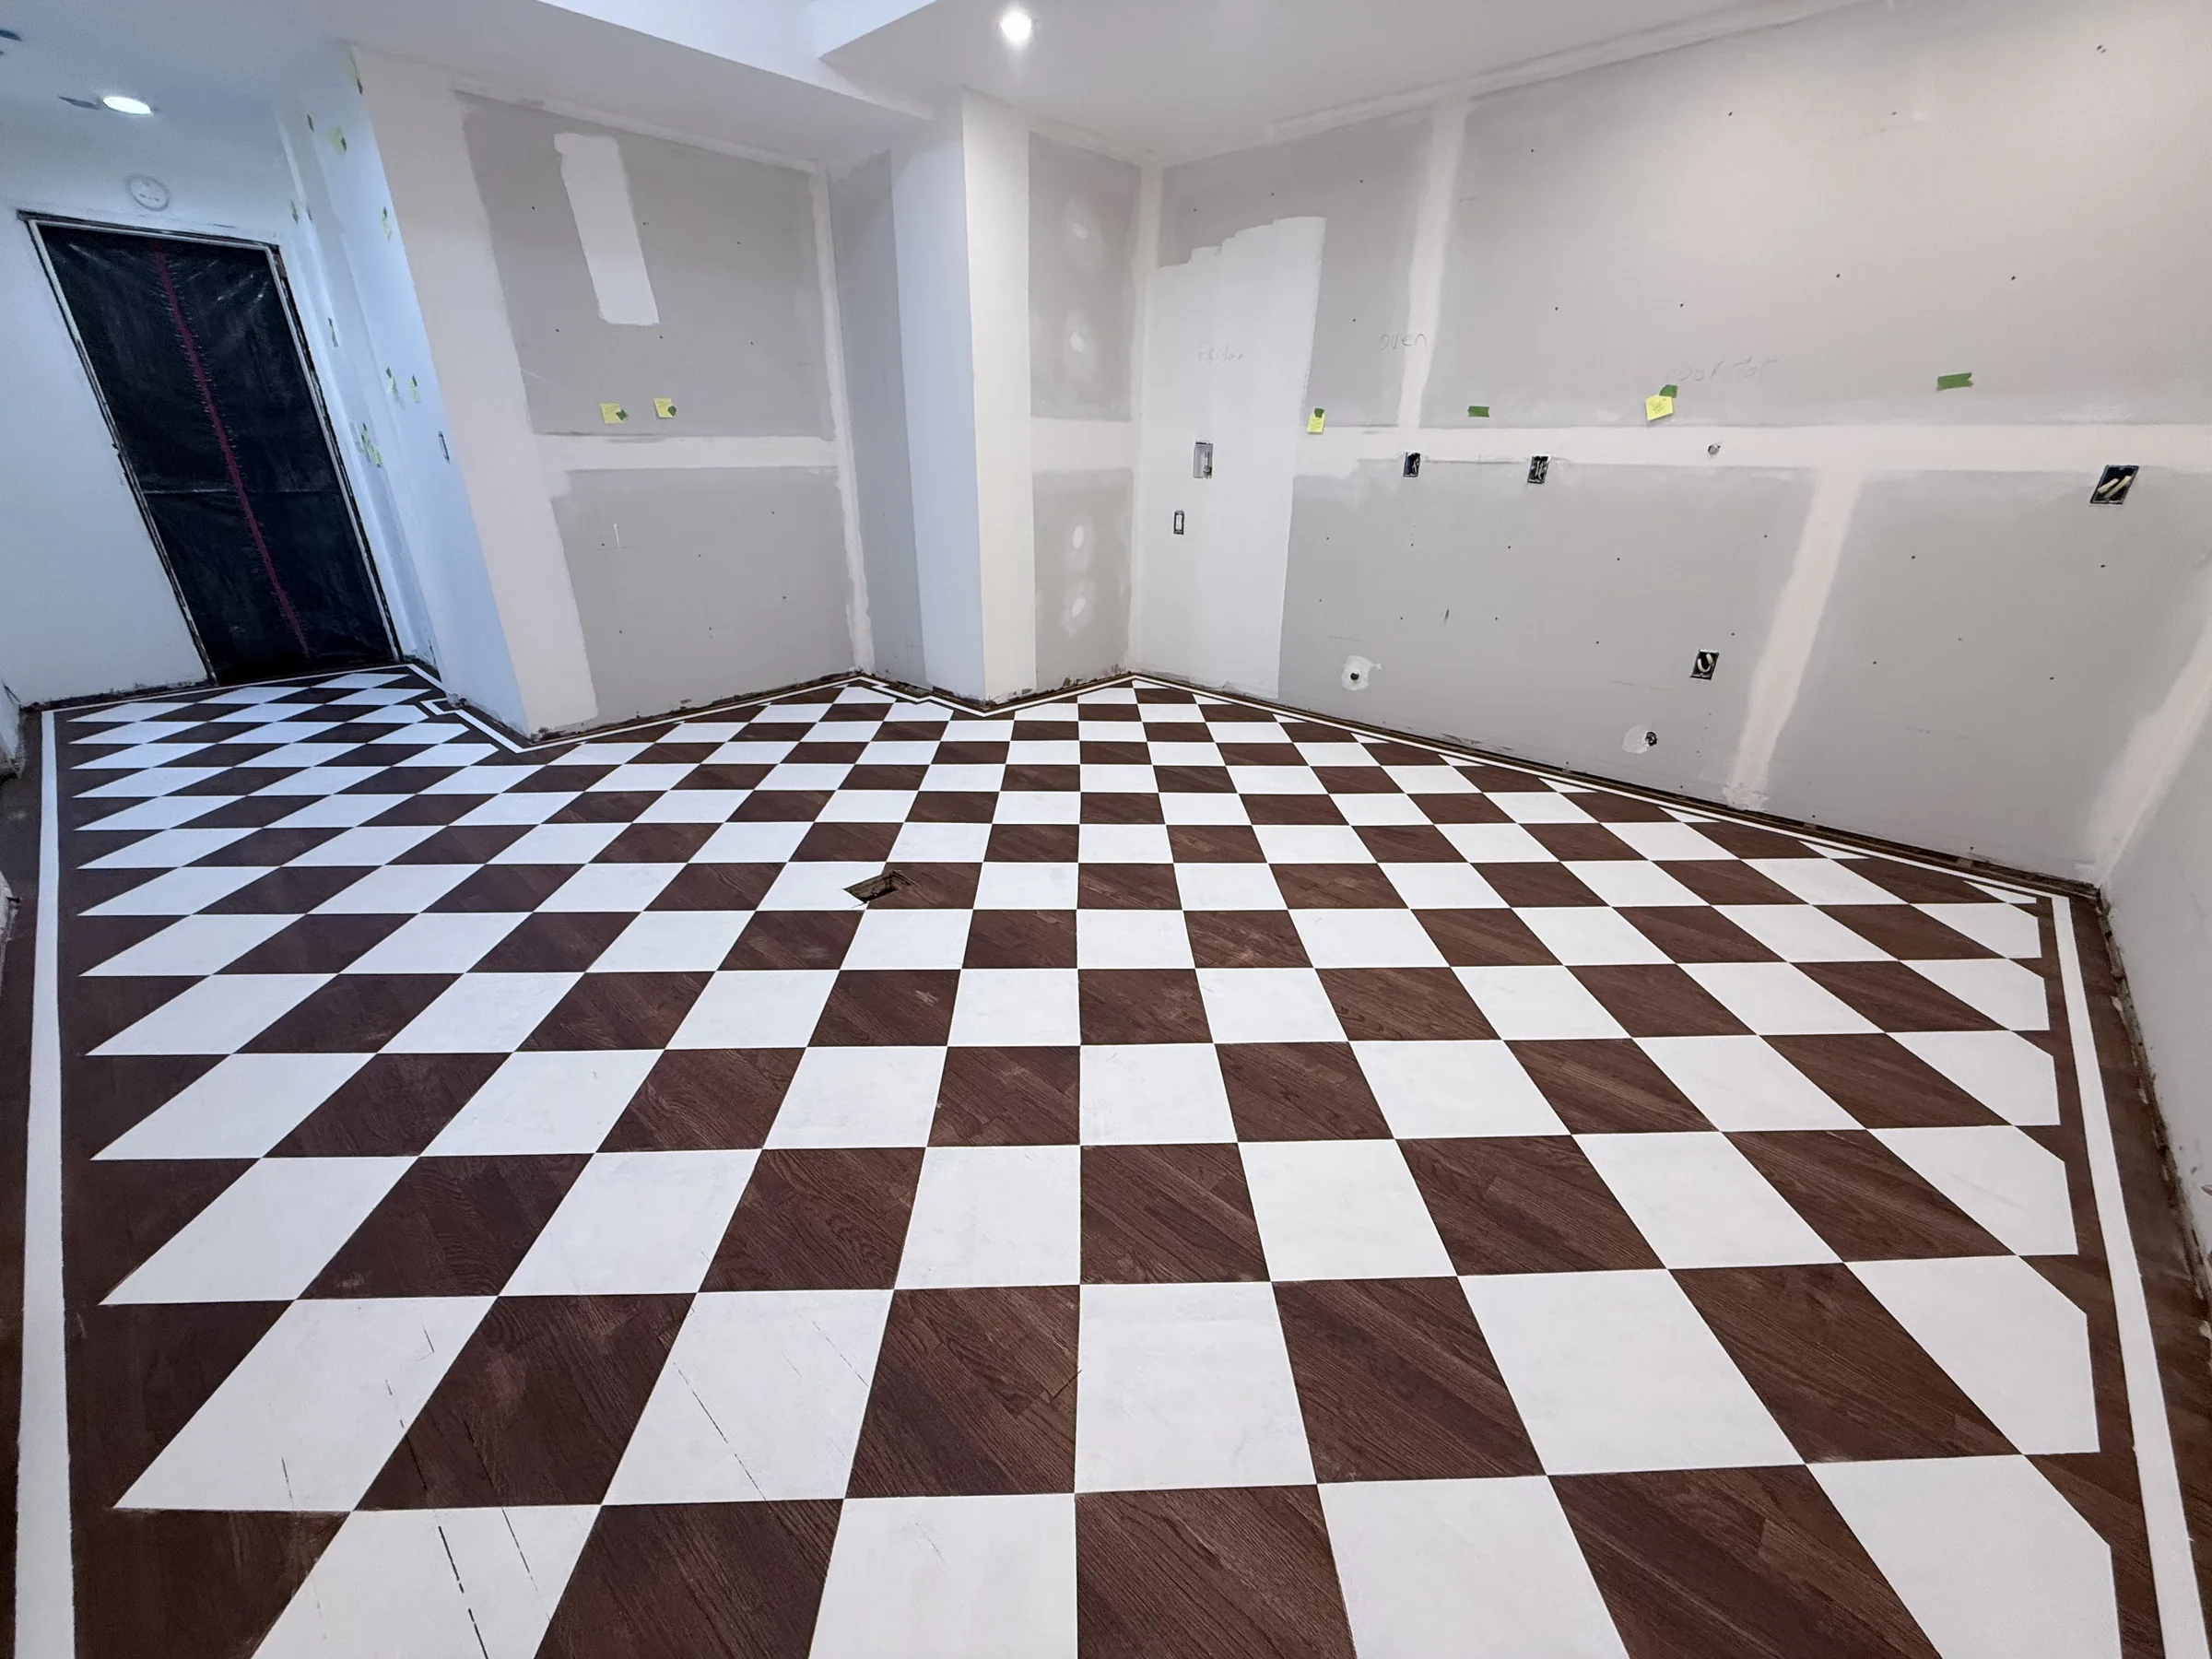
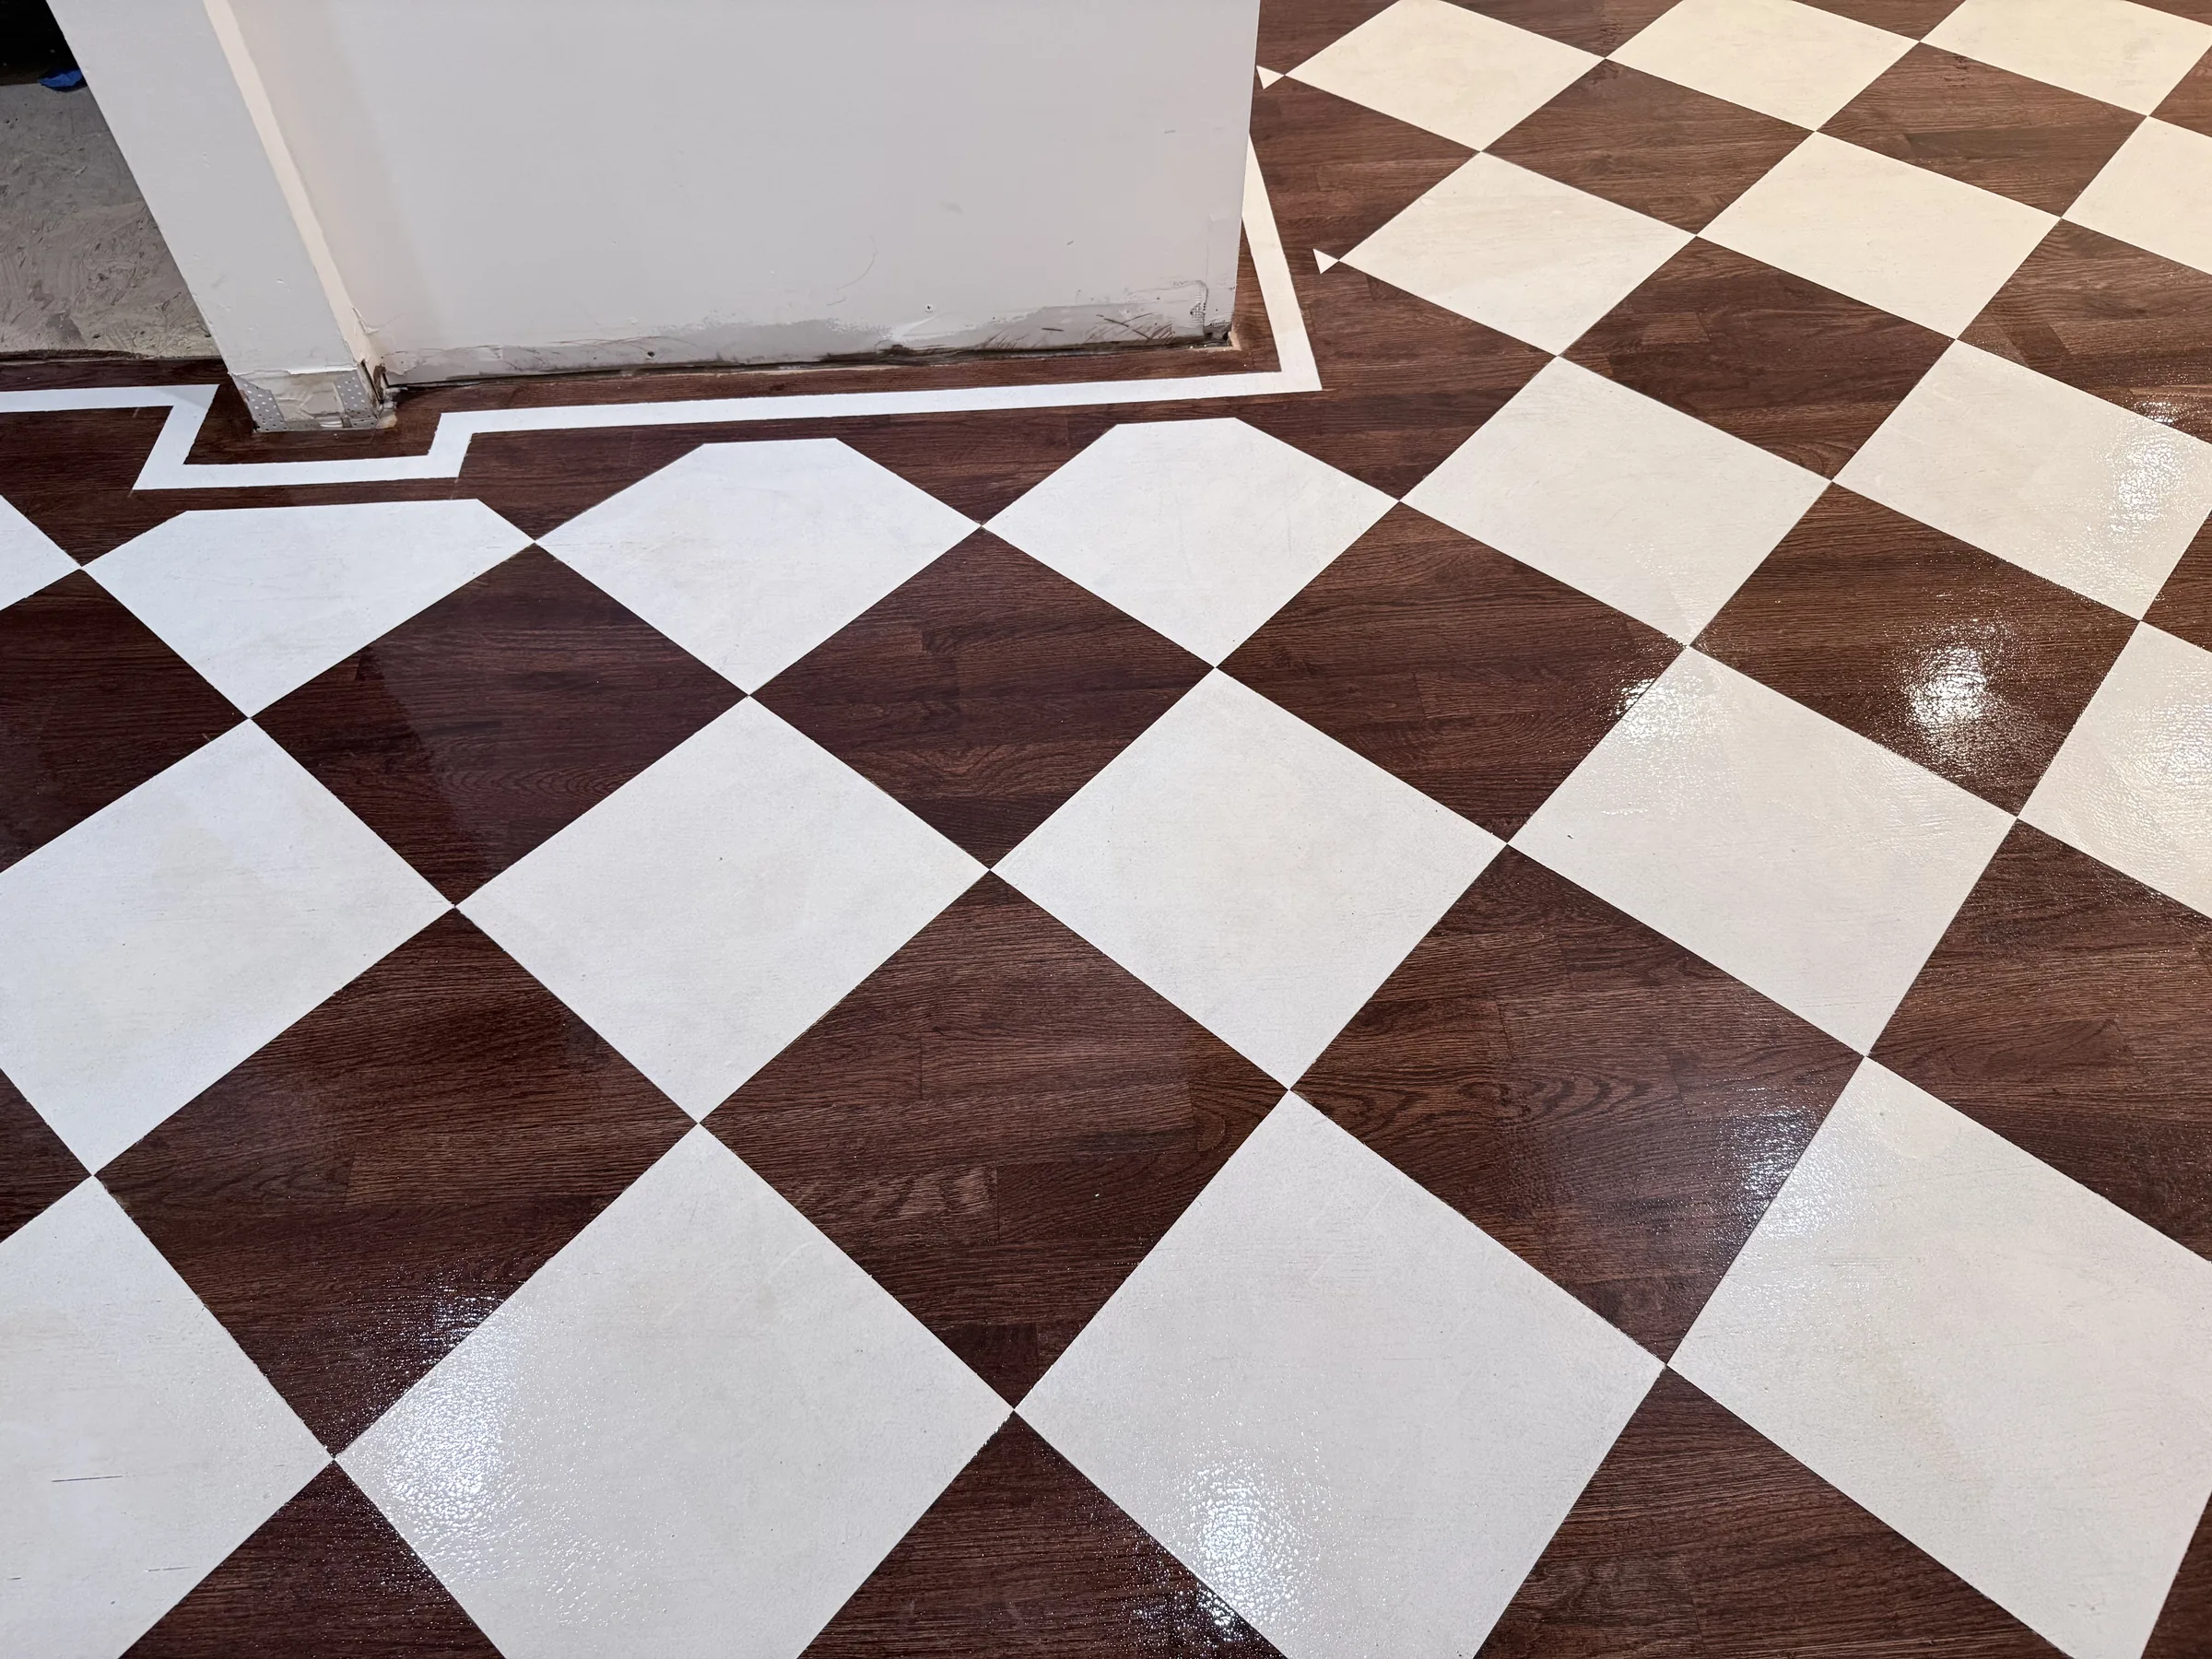
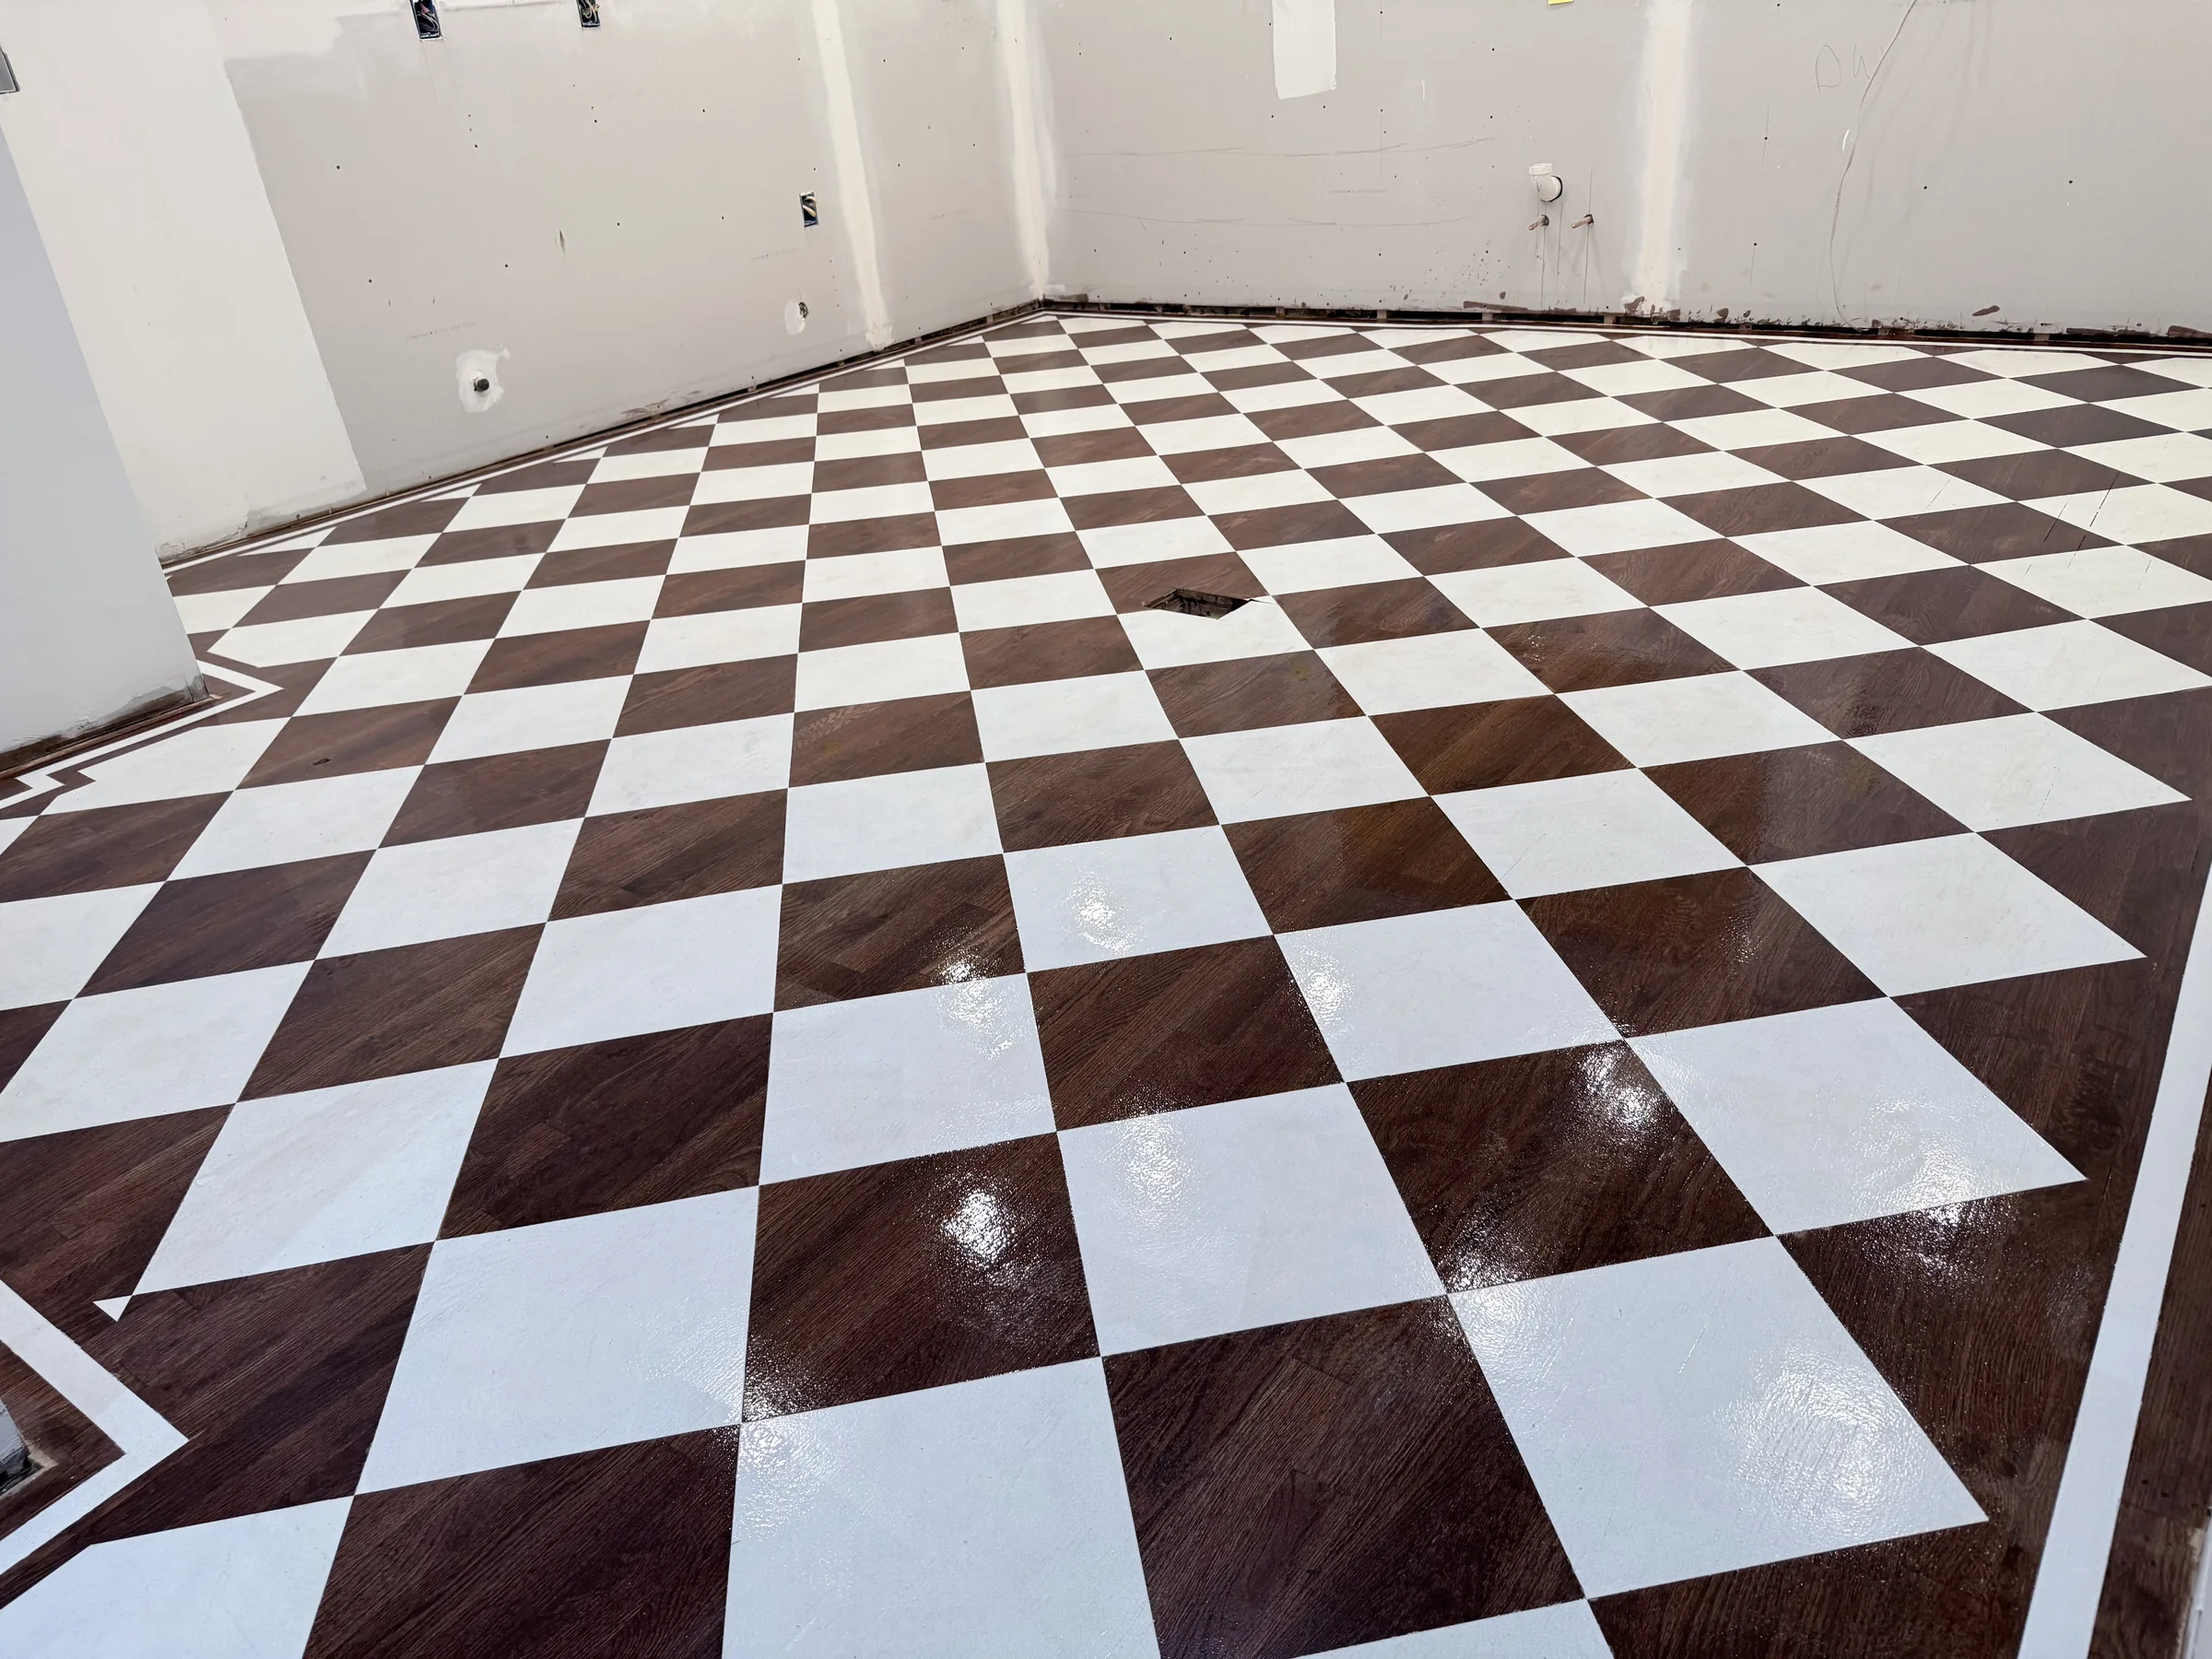
After: a sealed, glossy chess-pattern floor
Two coats of paint and a two-coat epoxy-based polyurethane topcoat over a diagonal diamond grid.
A two-coat epoxy-based polyurethane topcoat sealed the pattern with a glossy finish.The finished floor, shot from the same corner as the starting photo.The completed chess-pattern floor, sealed and ready for years of use.
Want a chess or checkerboard pattern painted on your floor?
This project connects to checkerboard floor painting, interior painting, and floor repair, which Repair ASAP offers in Manhattan, Brooklyn, Queens and Staten Island.
Can you redo a chess or checkerboard floor that another contractor painted?
Yes. On this project, an earlier chess-pattern paint job on the same floor hadn't come out clean, so the layout was taped out fresh and repainted from scratch over the existing stain.
How is a chess or checkerboard pattern painted onto an existing floor?
A diagonal diamond grid is taped out and squared to the room, then the alternating diamonds are painted in two coats over the existing floor color or stain. The tape is pulled while the paint is still fresh so the edges stay sharp.
Why does a painted floor pattern need a topcoat?
A topcoat protects the painted pattern from foot traffic and wear. This floor was sealed with a two-coat epoxy-based polyurethane finish for durability and a glossy look.
How long does a painted chess-pattern floor take?
This project took four visits of a few hours each, spread over about a week. The visits were spaced out for drying and cure time between taping, painting, tape removal, and the topcoat, not because the work itself was slow.
Thinking about a painted pattern floor?
Send a few photos of your floor and Repair ASAP can quote a chess or checkerboard pattern, start to finish.